How to Use Vizcom Try-On
Overview
Vizcom's Try-On feature allows you to quickly visualize garments or materials on models by referencing existing designs. Follow these steps to achieve the best results
How to Use
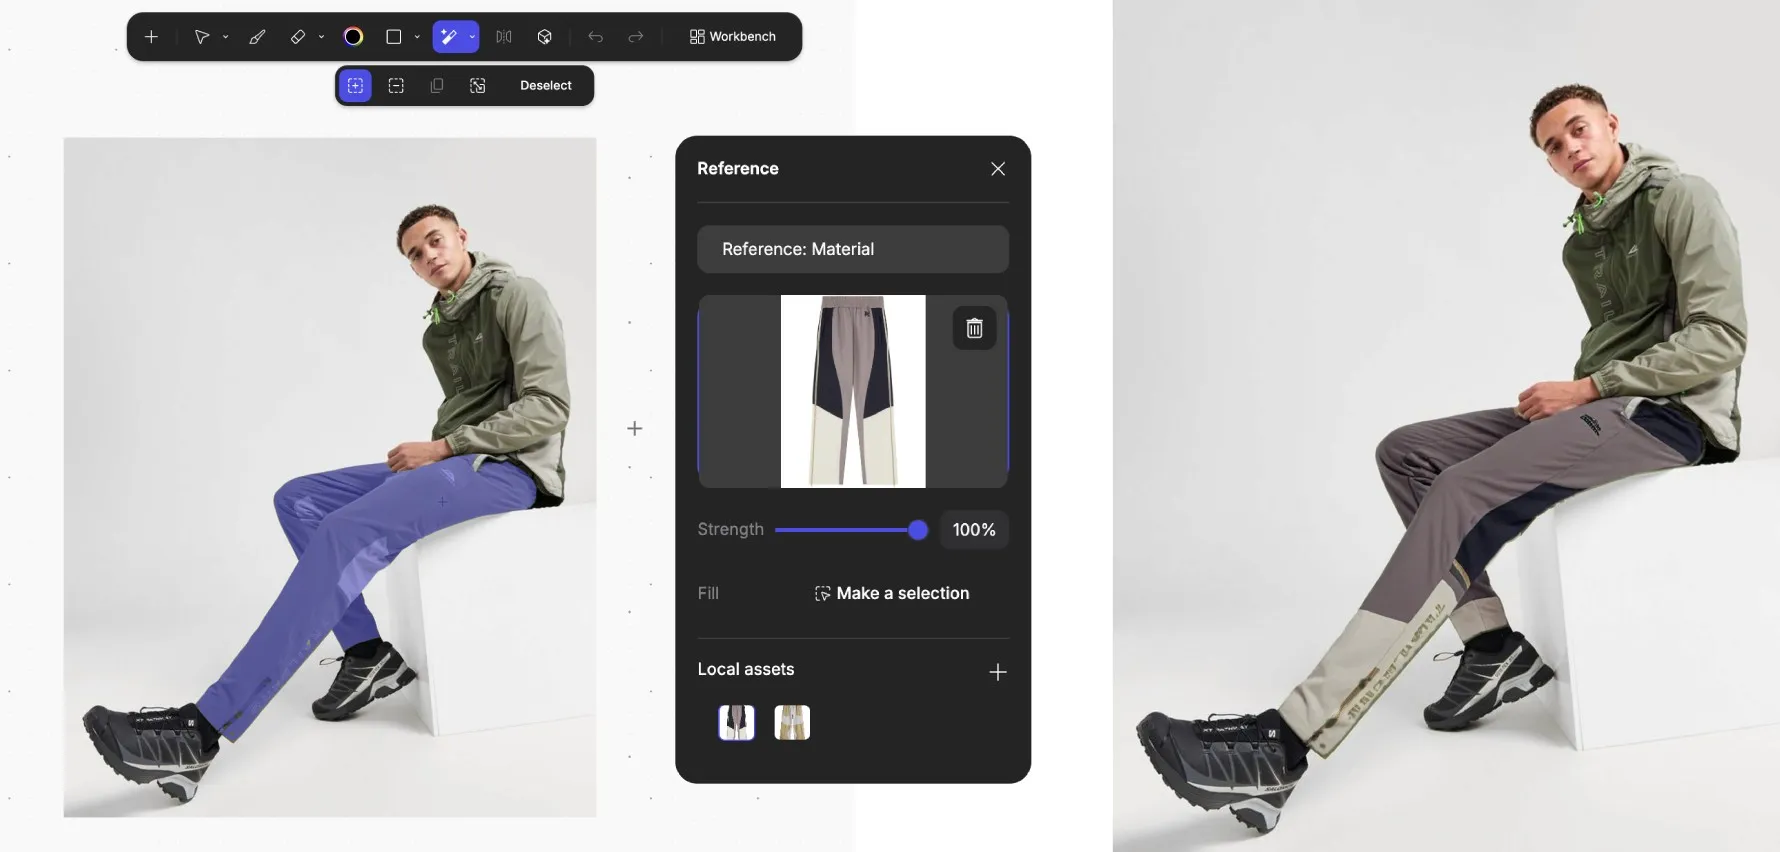
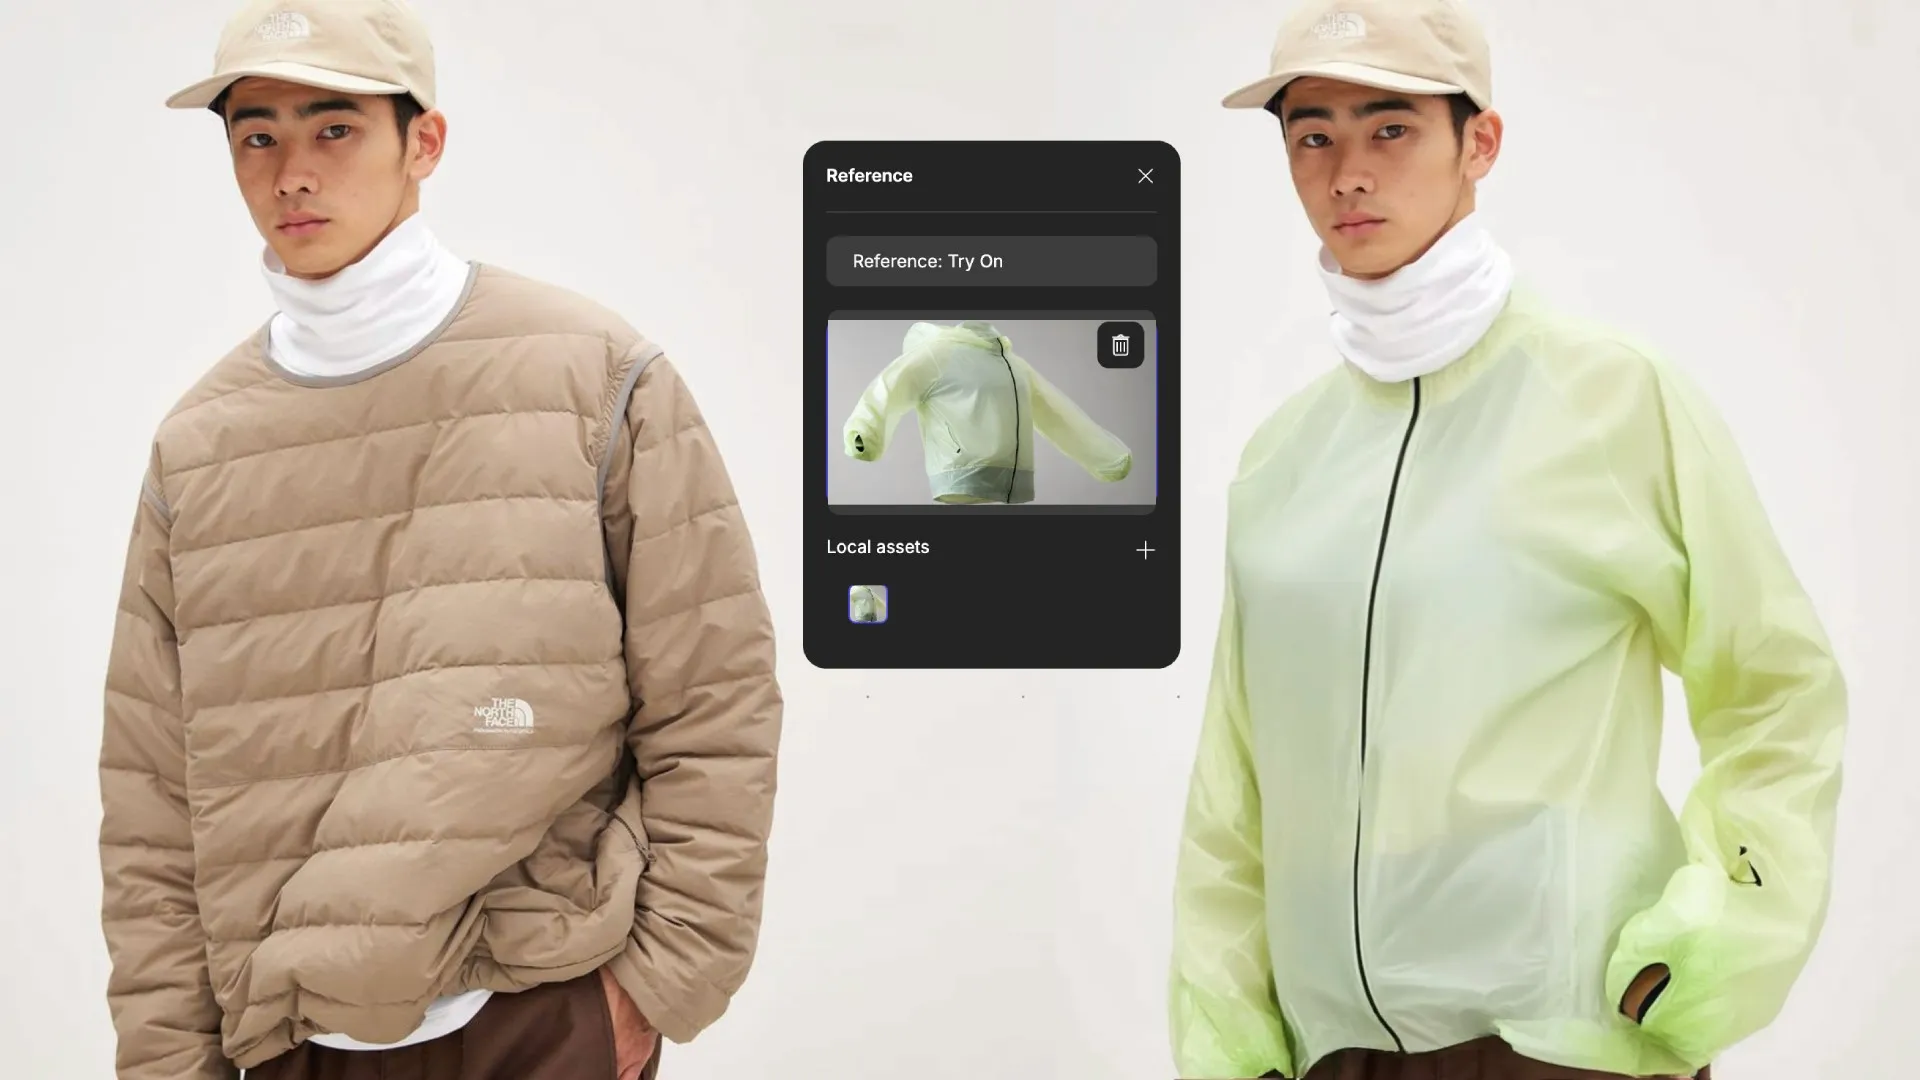
- Upload or select your base image - This should be a clear photo of a model wearing clothing you want to modify
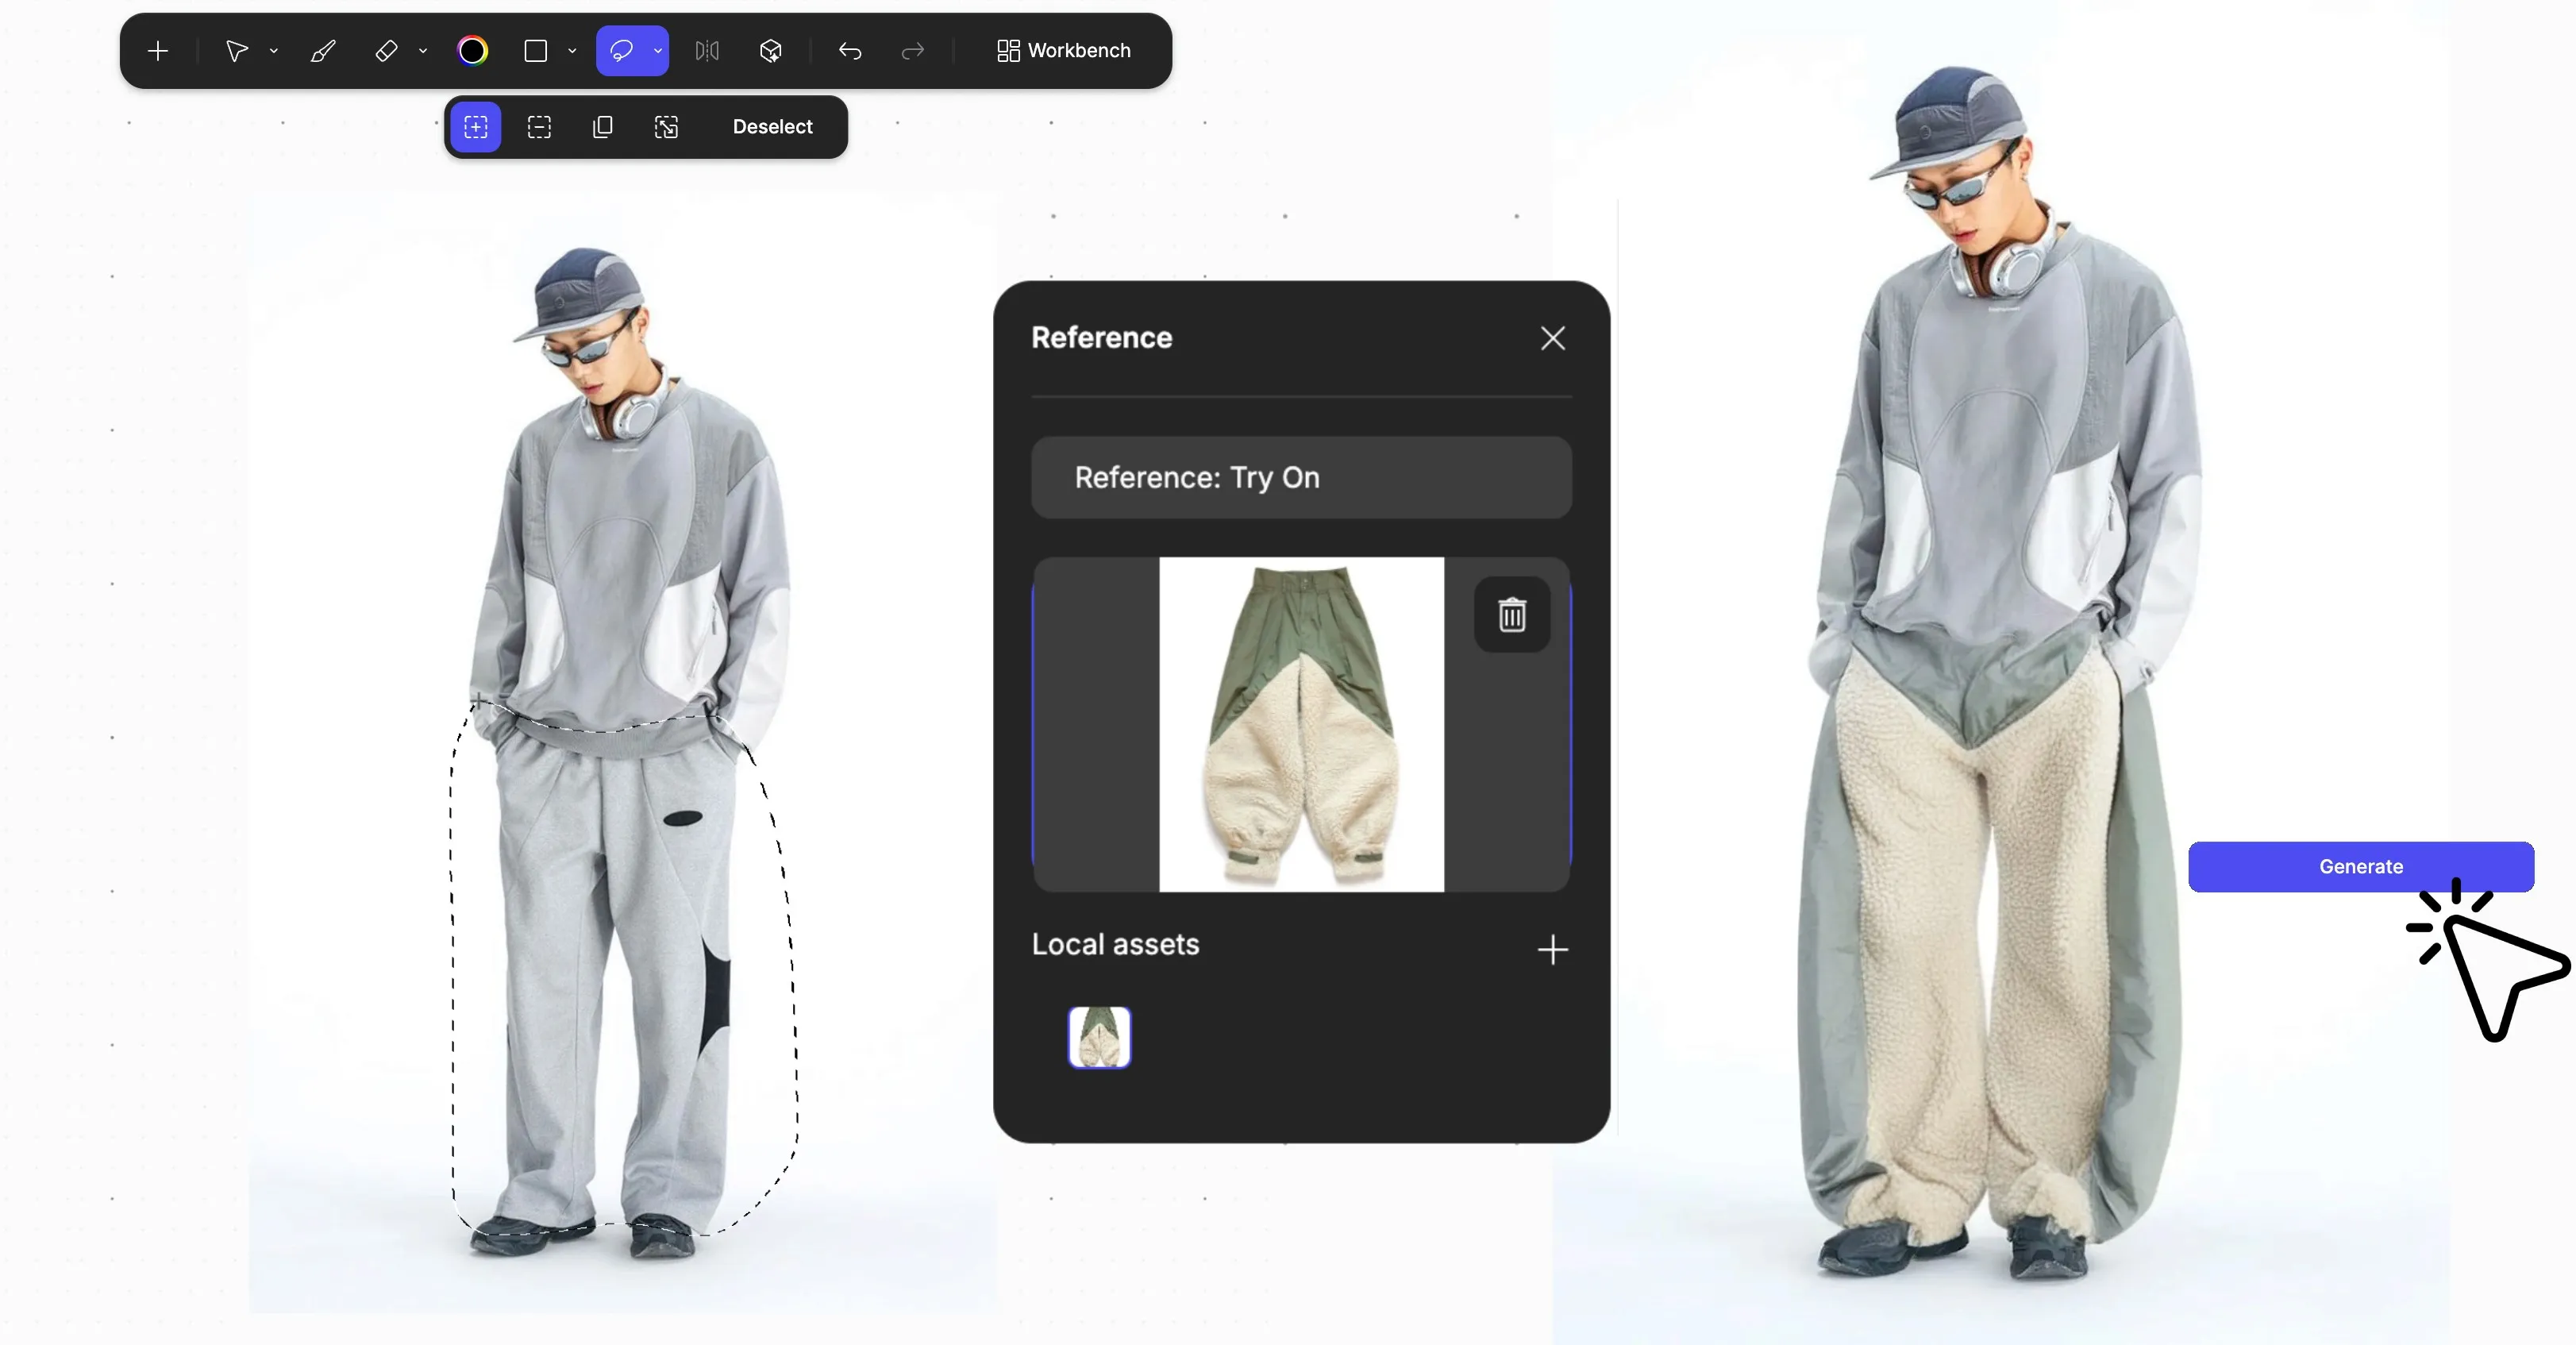
- Access the Reference panel - Click the Reference button in the create panel
- Select "Try On" mode - From the Reference panel dropdown, choose "Try On"
- Upload your reference garment - Add an image of the specific garment you want to apply
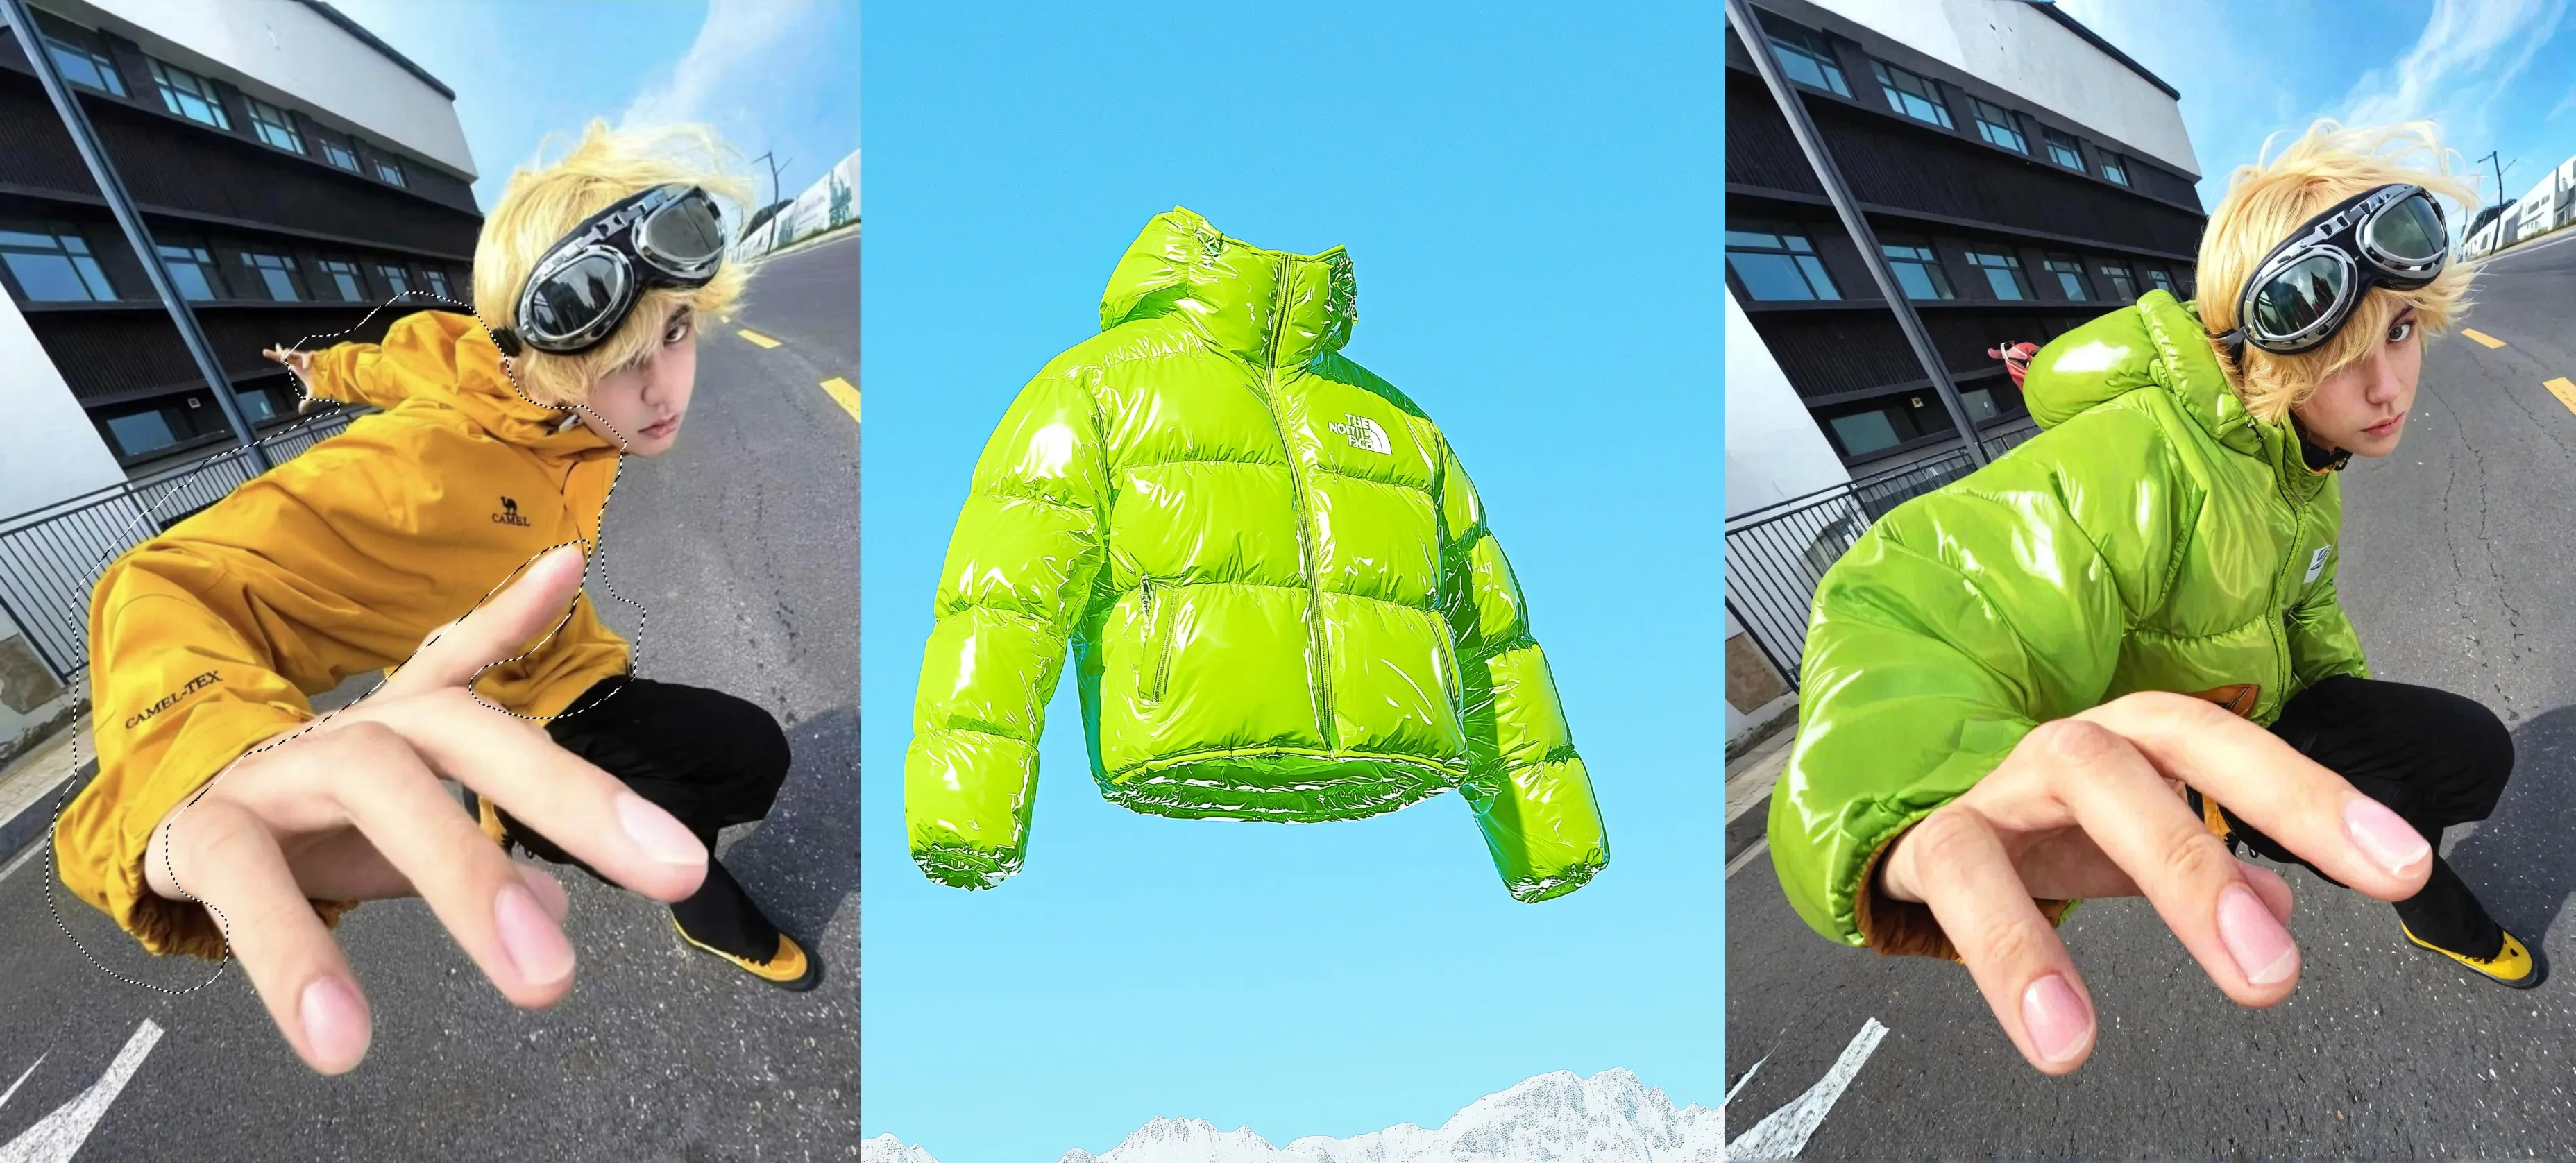
- Use front-facing, clearly visible garments for best results
- Images with minimal background distraction work best
- Generate - Click the Generate button to apply the reference garment to your selection
Troubleshooting: "Couldn't generate your image" Error
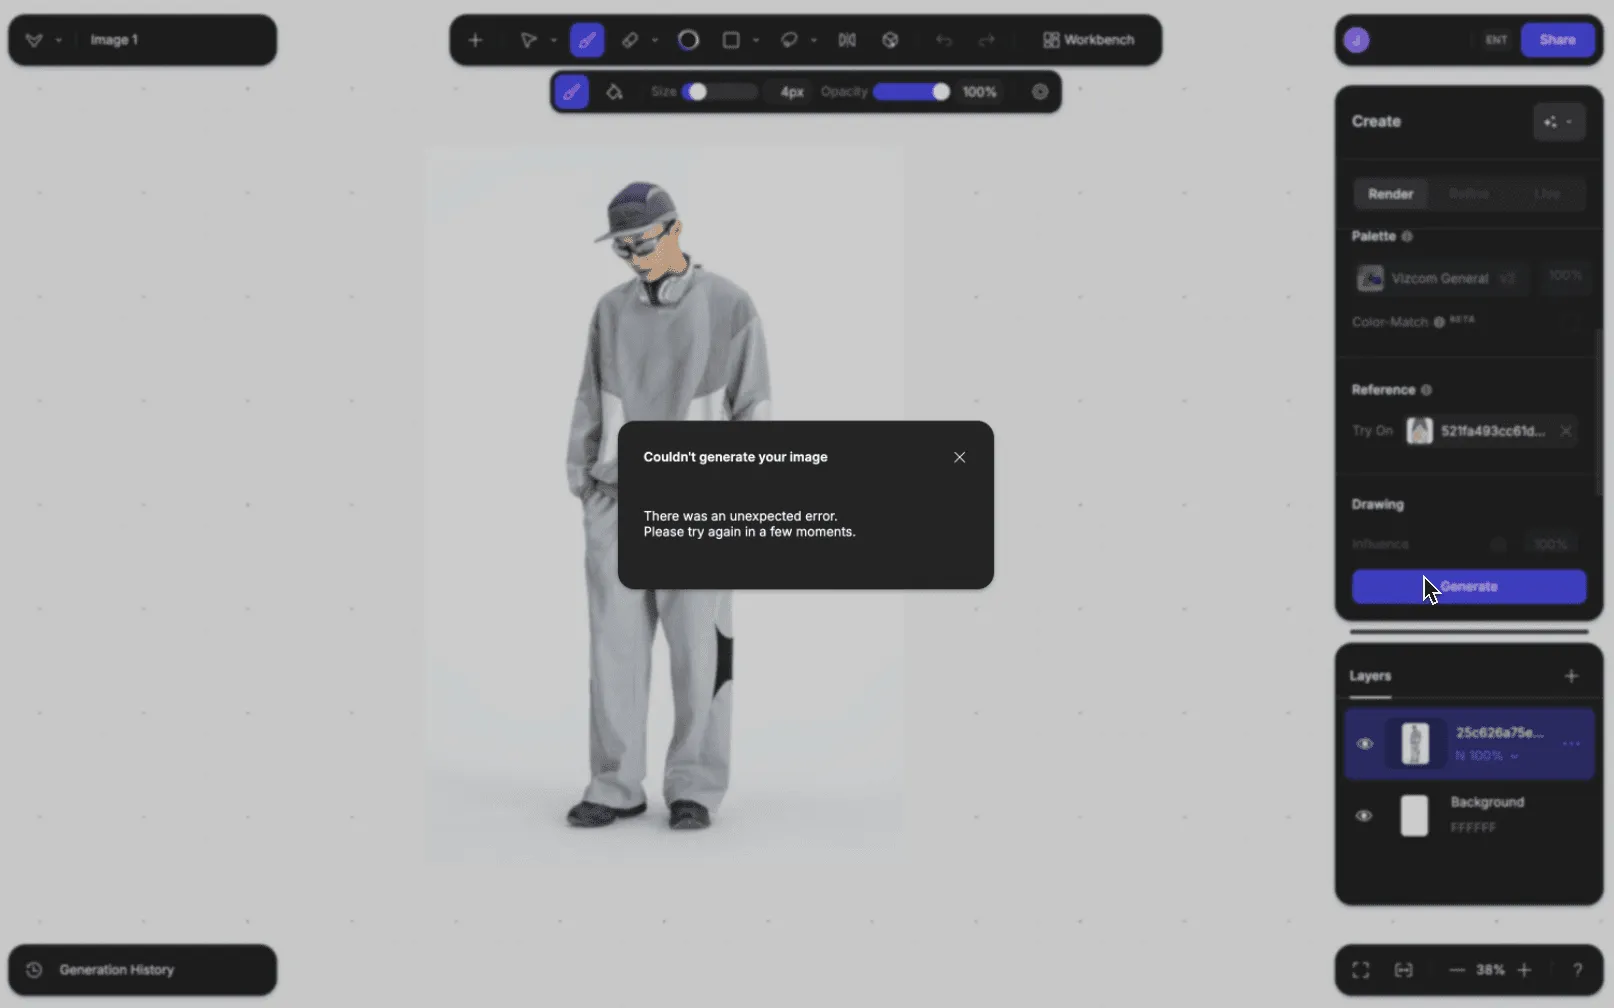
If you encounter the error message that says "Couldn't generate your image" with the text "There was an unexpected error. Please try again in a few moments," this typically means Vizcom doesn't know where to apply your changes.
Solution:
Before clicking "Generate," you need to:
- Use the selection tool (located in the toolbar) to highlight the specific area where you want to apply the garment or modification
- Make sure your selection area is clearly defined - the blue highlight should cover the entire region you want to modify
- After making your selection, then click "Generate"
Best Practices
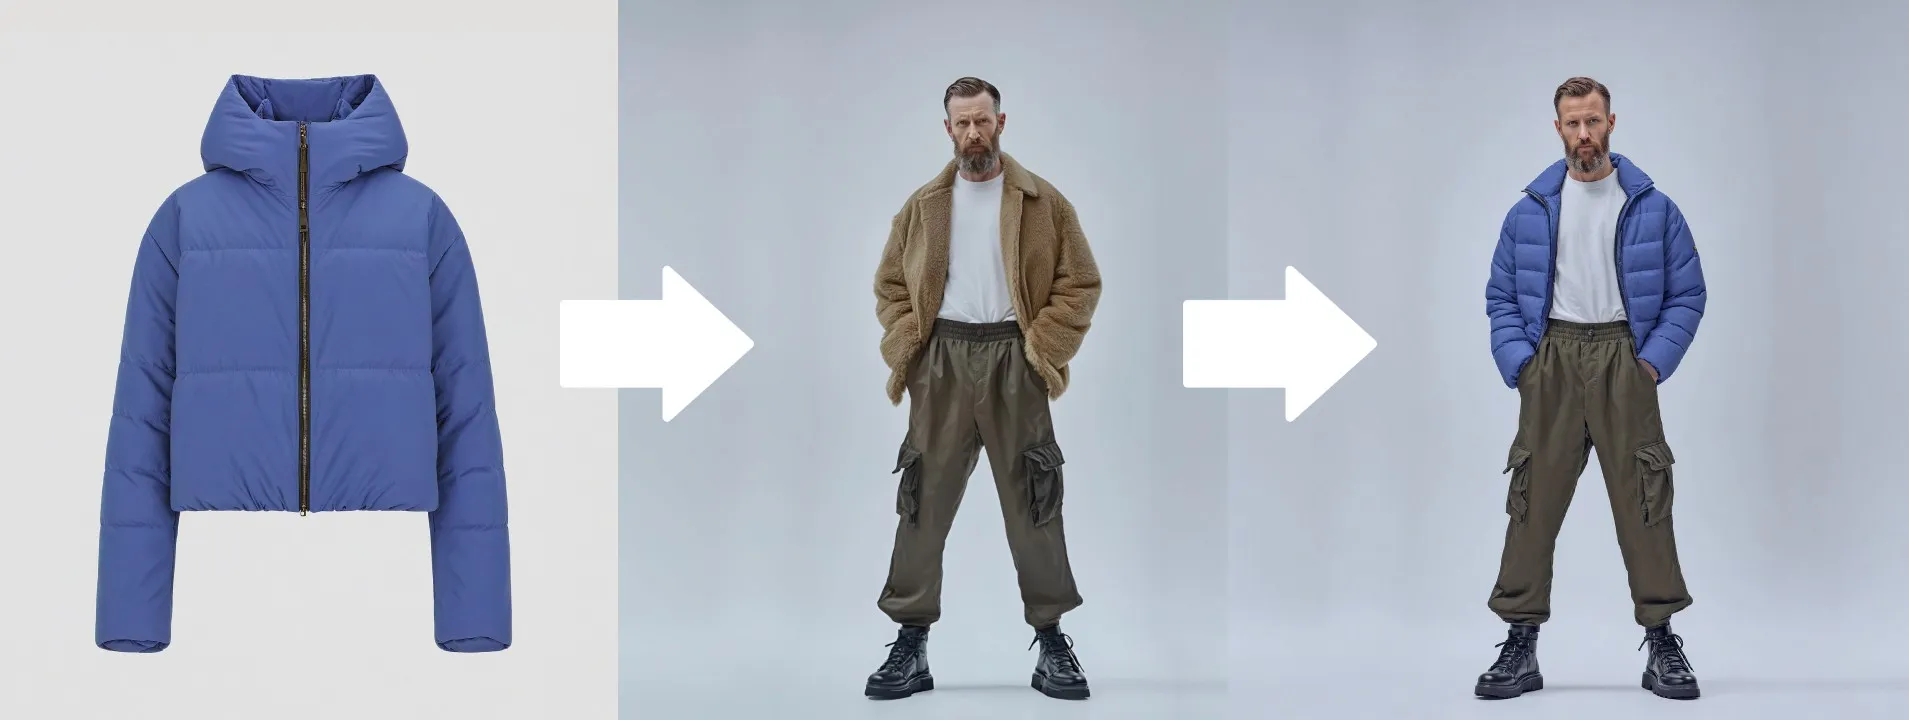
- Use a clear reference image: Select a high-quality, front-facing image of the garment you want to apply (like the blue jacket shown)
- Select the appropriate area: Before generating, use the selection tool to highlight the upper body area of your model where the garment should be applied
- Consider the model's original clothing: The system works best when replacing similar types of garments (in this case, replacing an outer layer with another outer layer)
Remember: Vizcom may need to know exactly where to apply changes. Without a selection, Vizcom will guess which part of the image to focus on, leading to this error.
Examples

Have a question for our team?
Frequently asked questions
Explore all features in Vizcom or book a tailored demo for you and your
Yes of course! Our starter plan is completely free, no credit card required. This is a great plan to explore vizcom with.
We accept all major credit and debit cards.
Admins (paid) – can edit files, manage workspace settings, billing, teams, and invite members. Editors (paid) – can edit files but not manage settings, billing, or teams. Viewers (free) – can only view files in read-only mode.
Team billing is handled centrally by the Admin. All paid seats, whether Admins or Editors, are included in a single invoice under the same billing cycle, while Viewers remain free and do not affect the cost.
Yes, you can. An Admin can update the plan in the billing settings, and the switch will take effect on the next billing cycle at the annual rate.
Yes, you own everything you create in Vizcom. For free users, while Vizcom may use generated images to improve its services, it does not claim ownership of your designs, concepts, or original ideas—you keep full rights to them. For paid users, your images and designs remain entirely private and are only used to deliver the service. Every design, concept, and image you create or upload is fully yours and kept confidential.
Vizcom does not use your data to train AI models if you’re on a paid plan. Everything you create stays private and is only used to provide the service. Free users may have their generated images included to help improve Vizcom’s services, but even then, Vizcom does not claim ownership of your designs, concepts, or original ideas—you retain full rights.