
Design Sprint for Physical Products: A Five-Day Framework
Run a five-day design sprint adapted for physical products that covers problem mapping, concept sketching, prototyping strategies, and user testing before manufacturing commitment.

You know that moment when your team's been debating product direction for weeks? Manufacturing wants validation before tooling. Stakeholders want proof before investing. Design sprints compress that into five focused days. You map problems on Monday, test prototypes on Friday, and force decisions you'd normally defer until manufacturing begins.
The stakes are high for physical products. Fabrication takes time, materials cost money, and manufacturing commitments carry consequences. You'll answer critical questions about form, interaction, and user response before committing to production.
This guide walks through the five-day structure adapted for physical product constraints, covering problem mapping, concept development, prototyping strategies, and user testing.
What Is a Design Sprint?
A design sprint is a five-day process for answering critical business questions through design, prototyping, and testing with real users. Originally developed at Google Ventures and documented in Jake Knapp's Sprint, the format compresses months of debate into one focused week.
For physical products, sprints validate form, interaction, and user response before committing to tooling and manufacturing. The assumptions that usually go unexamined until production begins get tested now, when changing direction still costs nothing.
The structure follows five days: map the problem, sketch concepts individually, decide which direction to prototype, build realistic prototypes, and test with real users.
Day 1: Map the Problem and Define Your Target
Map the problem space first. You prevent your team from sketching solutions to different problems. By aligning on goals before anyone picks up a marker, everyone's creative energy flows in the same direction.
Expert Interviews
Start with expert interviews. Your packaging engineer talks about material constraints. The retail buyer explains shelf requirements. Users describe what frustrates them about existing products.
Cap each presentation at ten minutes to maintain momentum. When someone explains production realities or describes how products fail, these constraints shape realistic concepts later.
Lightning Demos
Run Lightning Demos to examine how other companies have solved similar problems across industries. A furniture designer might study automotive door mechanisms. A footwear designer might examine camera bag closures. These sessions reveal proven interaction patterns to adapt.
The Sprint Map
Create your Day 1 anchor, the map. This visual diagram shows how users move from their current problem to your concept.
Start by identifying your primary actors. Place the end goal on the right side. Then fill in the steps showing how actors move from beginning to end, including every touchpoint where they interact with your product.
For physical products, your map needs to show the complete lifecycle from retail discovery through unboxing, assembly, use, and replacement. Manufacturing constraints that digital products don't face belong here, too.
How Might We Questions
As you work through Day 1, turn insights into "How Might We" questions. These reframe problems as opportunities. Instead of "Users struggle with complicated assembly," write "How might we make assembly intuitive without instructions?"
By day's end, your team shares understanding of the problem, has documented key insights, and has set clear sprint goals.
Day 2: Sketch Concepts Individually
Individual sketching prevents groupthink and generates diverse concepts your team wouldn't discover through collaborative brainstorming. Working alone creates space for ideas that wouldn't survive premature group critique.
Notes and Ideas
Start by reviewing the Day 1 map and taking notes on key elements before sketching begins.
The Ideas phase gives you 15-20 minutes to convert notes into rough visual concepts. Sketch loose, sketch fast. Don't judge quality yet.
Crazy 8's
Crazy 8's forces rapid variation. Fold paper into eight panels and fill each one with a distinct approach in eight minutes total. This pace pushes past obvious first ideas and prevents overthinking.
Some panels won't work. The proportions feel wrong, or the mechanism doesn't make sense. That's the point. You're generating options, not committing to direction.
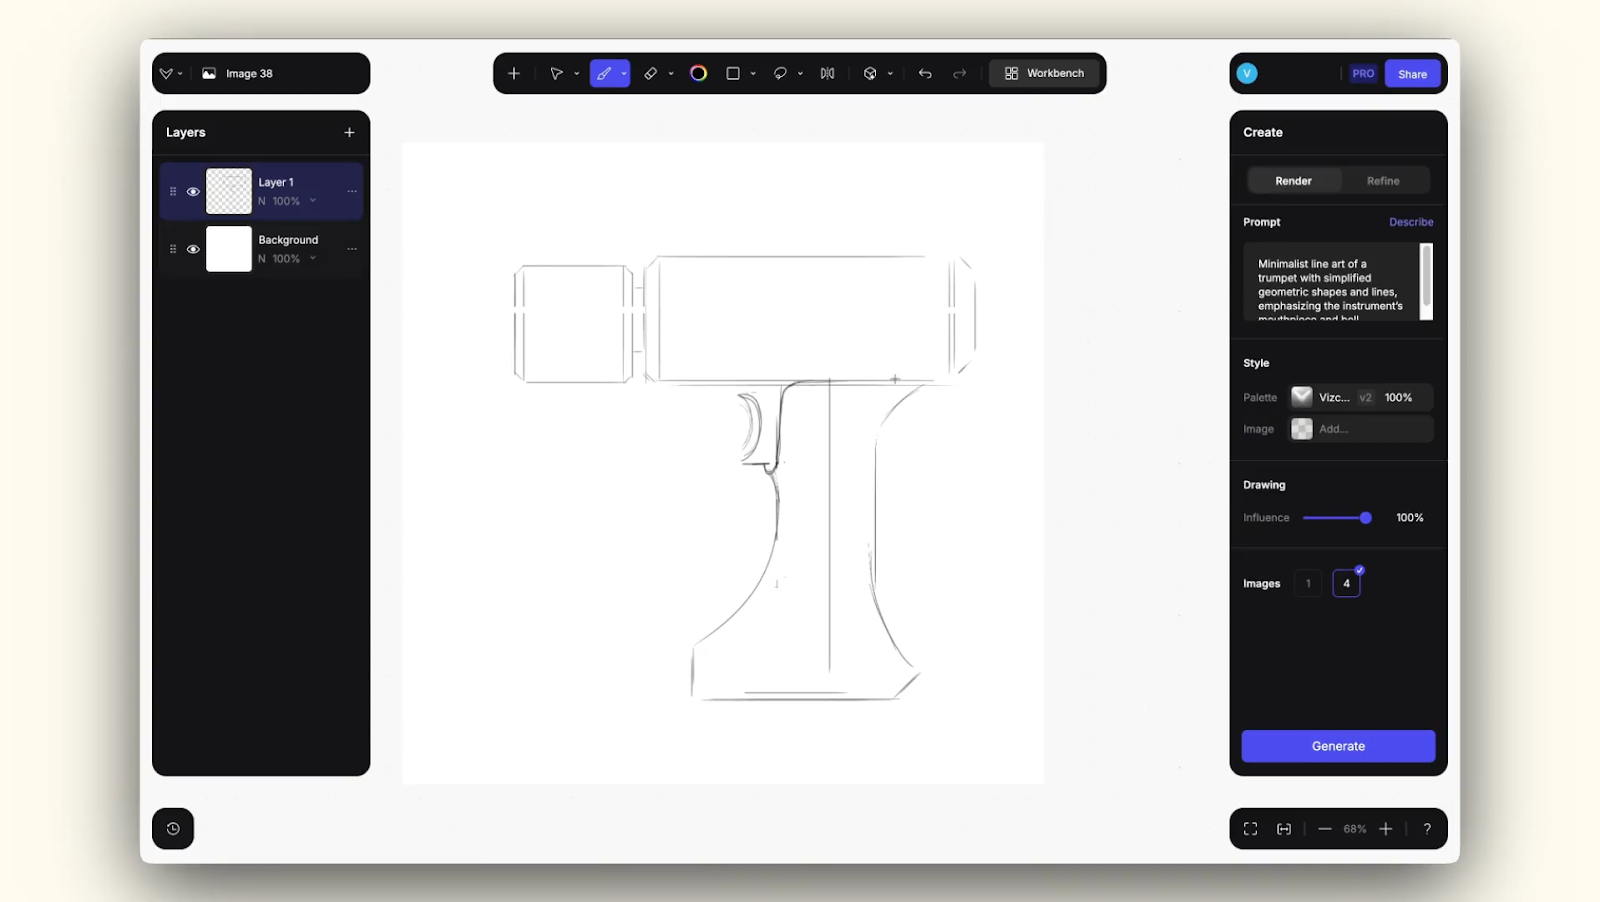
Concept Sketches
The Concept Sketch phase allocates 30-90 minutes for detailed work. Create a three-panel storyboard showing how a user encounters and interacts with your concept. Communicate the user journey clearly enough that stakeholders understand your thinking. Rendering skill matters less than clarity.
Each team member should produce eight rapid concepts during Crazy 8's and develop at least one detailed concept sketch. This gives the team sufficient diversity for the Day 3 evaluation.
Day 3: Decide Which Direction to Prototype
You'll make the decision that normally stalls for weeks. The framework balances team input with clear leadership to convert sketches into a detailed storyboard blueprint.
Art Museum and Heat Map Voting
Tape all Day 2 concept sketches to the wall in an "art museum" layout for simultaneous viewing. This spatial arrangement lets you see patterns, compare approaches, and evaluate concepts against each other.
Everyone receives dot stickers to mark interesting or concerning aspects. This silent voting prevents hierarchy from influencing choices. Dot clusters show which concepts resonate most.
Speed Critiques
Rapid, time-boxed reviews of each concept follow. Discuss strengths. Flag concerns. Move on. Maintain strict time boundaries to ensure the team completes all decision-making steps without endless debate.
The Supervote
The straw poll surfaces team perspective but remains advisory. The Decider (typically the business owner, CEO, or product manager) makes the final choice through a supervote after reviewing results.
This structure prevents decision paralysis while still incorporating team input.
Storyboarding
The day concludes with storyboarding. A visual sequence showing key moments you'll test on Day 5.
Each frame shows a critical interaction. The user discovers the product, encounters the problem it solves, and interacts with key features. This defines exactly what the prototype needs to demonstrate.
Day 4: Build a Realistic Prototype for Testing
You'll validate direction without achieving production readiness. Create something believable enough to test your core assumptions within sprint constraints.
Physical product prototyping within sprint timelines requires strategic decisions about what to build and at what fidelity.
Three Prototyping Approaches
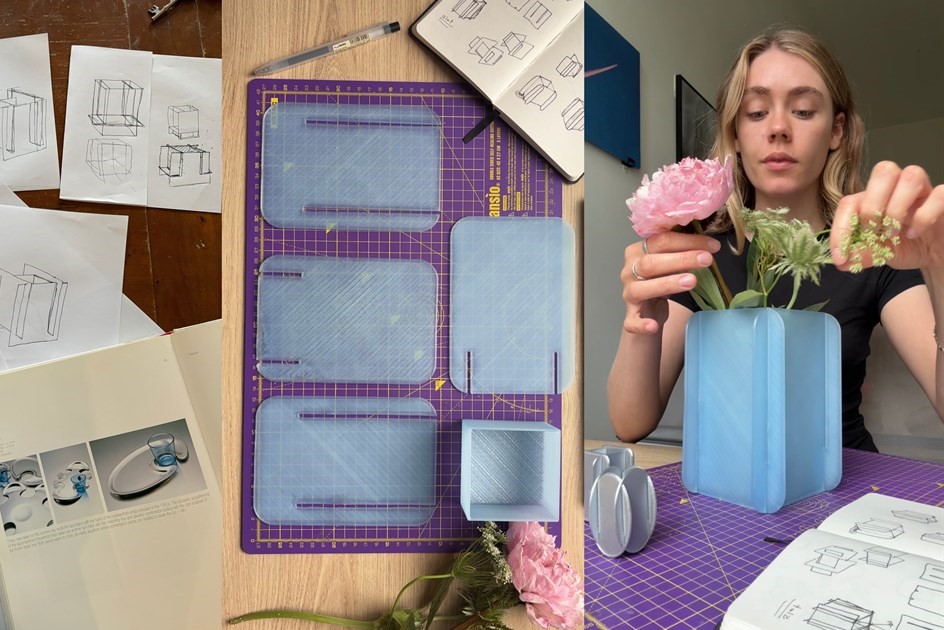
Storyboard-driven physical staging works for products where form and aesthetic matter most. Use foam, cardboard, or basic materials to create only the surfaces users will see and touch. Stage these in environments matching your Day 3 storyboard, then photograph them in context.
Rapid prototyping for critical touchpoints applies when interaction and ergonomics need validation. Print handles, interfaces, or key touchpoints that users will physically manipulate during testing. Leave the rest as mockup materials. Printing complete assemblies takes days, but critical components can finish overnight if files are prepared in advance.
Basic materials combined with photography works when stakeholders need to understand proportions or spatial relationships. Create appearance models, photograph them in realistic contexts, and use these images during testing sessions.
Hybrid Visualization
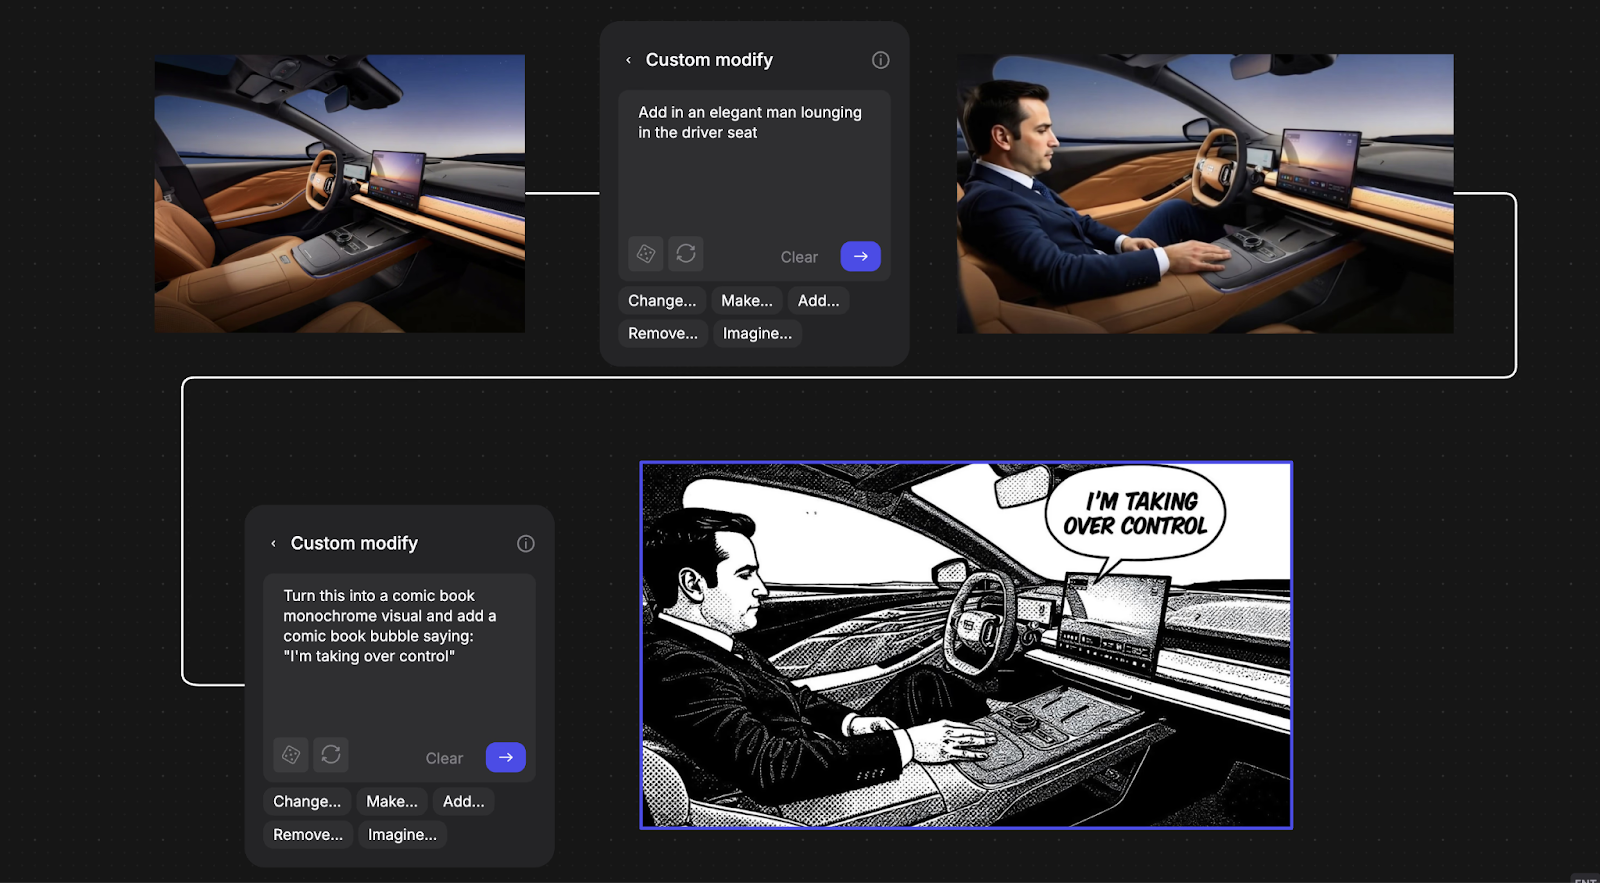
The most effective Day 4 strategy combines digital visualization with selective physical builds.
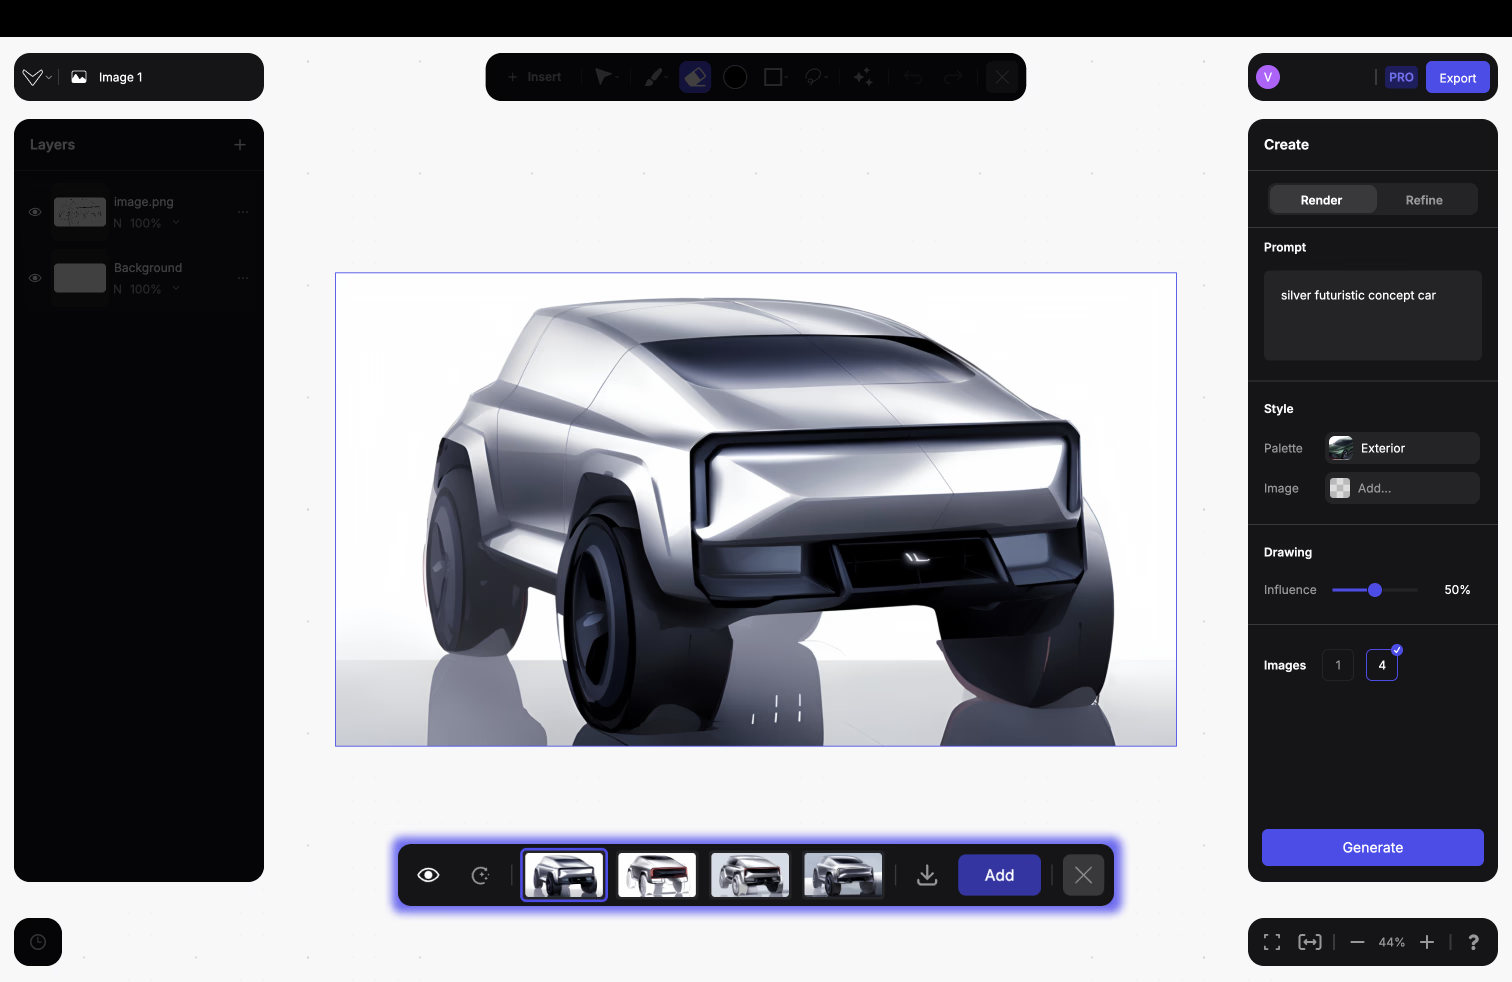
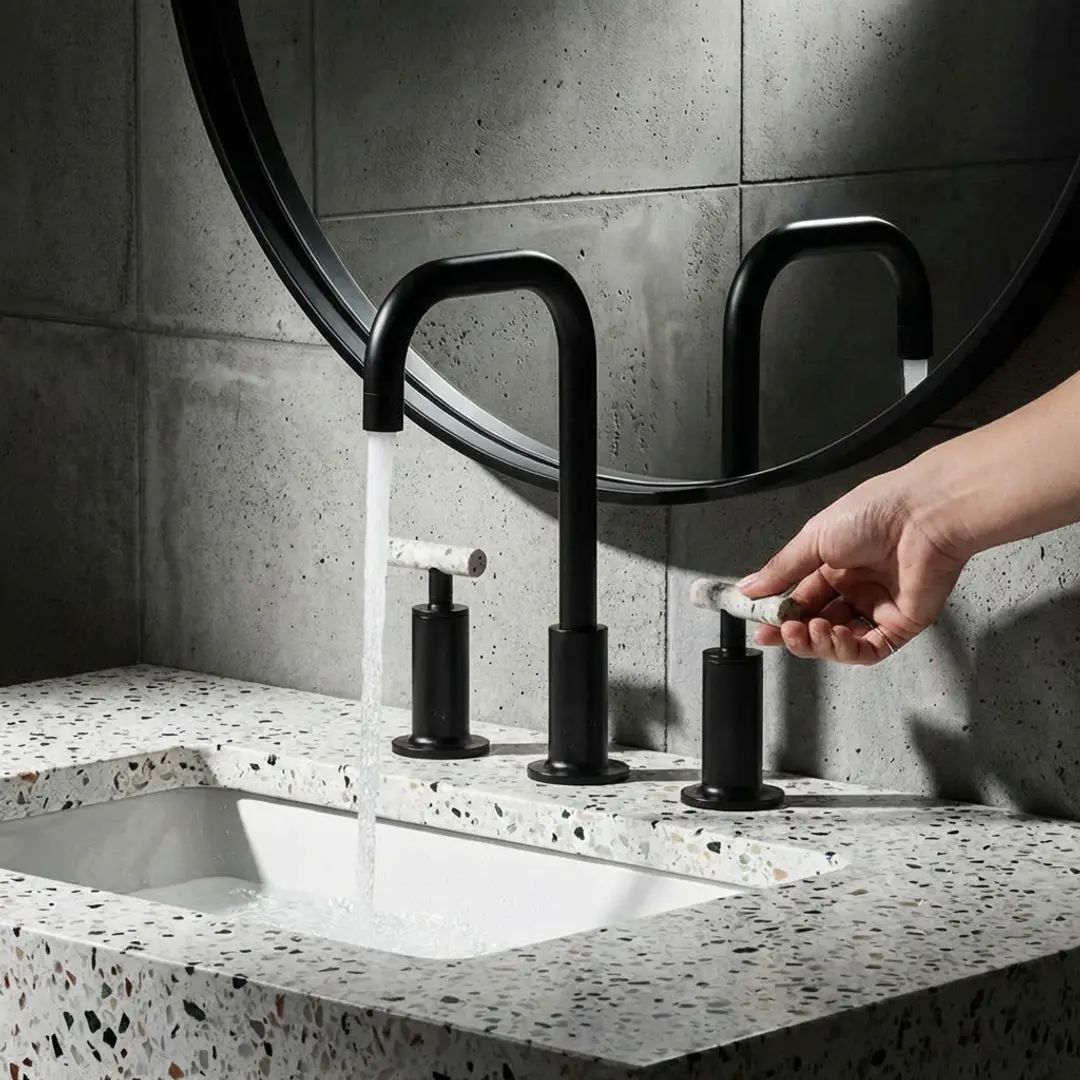
The Render feature generates photorealistic output showing specific materials and lighting in seconds. Test whether brushed aluminum or matte polymer reads better for your form language before committing to physical samples.
The Make 3D converts those renders into rotatable meshes stakeholders can evaluate from every angle. Verify that proportions working in your sketch also read correctly from three-quarter and rear views.
Modify Pro lets you refine renders without starting over. Swap materials on a specific component, place your product into an environmental context, or annotate directly on the image with redlines and circles to mark changes. The feature updates only what you select while preserving lighting, pose, and surrounding details.
Custom Palettes maintain consistent material treatments across all concept variations, so your team compares forms and proportions without getting distracted by inconsistent rendering styles.
Combine these digital assets with selective physical components for tactile validation. Foam mockups for scale and ergonomics, rapid-prototyped touchpoints for interaction testing. This multi-fidelity approach balances visualization speed with physical realism.
Day 5: Test With Real Users
You'll validate your assumptions through structured interviews. Conduct five interviews with real potential users, following a standardized protocol to test whether the prototype solves the problem you mapped on Day 1.
Preparation
Before the first session, list the key questions you need answered about user behavior and product assumptions. Review the conflicts and assumptions you made during sketching and deciding on Days 2-3.
Determine whether you'll test a single prototype or multiple prototypes in a competitive format. Prepare your interview structure.
The 5-Act Interview
Each interview follows the same format: welcome the participant, establish context, introduce the prototype, let them interact naturally while you observe, and debrief their experience.
For physical prototypes, this typically requires in-person sessions or video recording since participants cannot screen-share tangible interactions.
Pattern Recognition
Watch for repeated patterns across participants. When multiple people hesitate at the same interaction point, you've found a signal.
Every reaction (verbal feedback, body language, unexpected behavior) reveals whether this direction works. Sometimes your Day 3 storyboard looks perfect, but Day 5 testing reveals users don't understand the interaction at all. You discover this before manufacturing commits resources.
Synthesis
Between interviews, document observations and discuss findings as a team. By completing five interviews, patterns typically emerge that reveal whether your core assumptions hold or need revision.
Did the prototype validate your concept? What surprised you? What needs to change? Most importantly: what's your next step?
Adapting Sprints for Physical Products
Physical product sprints require adjustments to accommodate fabrication realities while maintaining sprint focus.
Fabrication Timeline Realities
Even rapid prototyping requires hours to overnight processing for parts to complete, then additional time for post-processing. This means starting some fabrication work on Day 3, or extending the sprint to create buffer time.
Pre-Sprint Logistics
Advance preparation matters more for hardware teams. Secure rapid prototyping access with guaranteed turnaround. Pre-order material samples. Reserve makerspace time. Coordinate cross-functional participation from manufacturing engineers and materials specialists.
While digital sprint teams can begin immediately, hardware teams need this preparation to execute effectively.
Manufacturing Constraints
Manufacturing constraints must inform Day 1 mapping and Day 2 sketching. Evaluate material availability, production minimums, and factory capabilities while sketching. This shapes which concepts are realistic to pursue.
Hybrid Prototyping as Standard Practice
The hybrid approach (digital visualization plus selective physical builds) emerges as standard practice among successful physical product teams.
Digital rendering compresses the visualization bottleneck that typically consumes Day 4. Generate photorealistic options showing material variations in seconds rather than hours, leaving more time for physical touchpoint fabrication that actually requires hands-on work.
Validate Before You Commit
One week of focused sprint work prevents months of manufacturing rework by validating direction before tooling investment. When the cost of getting it wrong is tooling investment and production minimums, spending one week to test direction saves months of rework.
Your first design sprint won't be perfect. Cross-functional coordination reveals unexpected challenges. Stakeholder alignment proves more complex than anticipated. The value comes from compressing learning cycles. You discover what users actually want and what manufacturing realities actually allow before your team commits significant development resources.
Each sprint teaches you how to make faster, better-informed decisions about which directions deserve full development investment.
Running design sprints for physical products? Book a demo to see how Render and 3D help you test more concept directions on Day 4 before committing to fabrication.
Explore
Explore more blog posts & resources to get inspired
Designer Tara Harcombe took her idea all the way from the first pencil lines to the finished piece, with Vizcom in the loop the whole way.
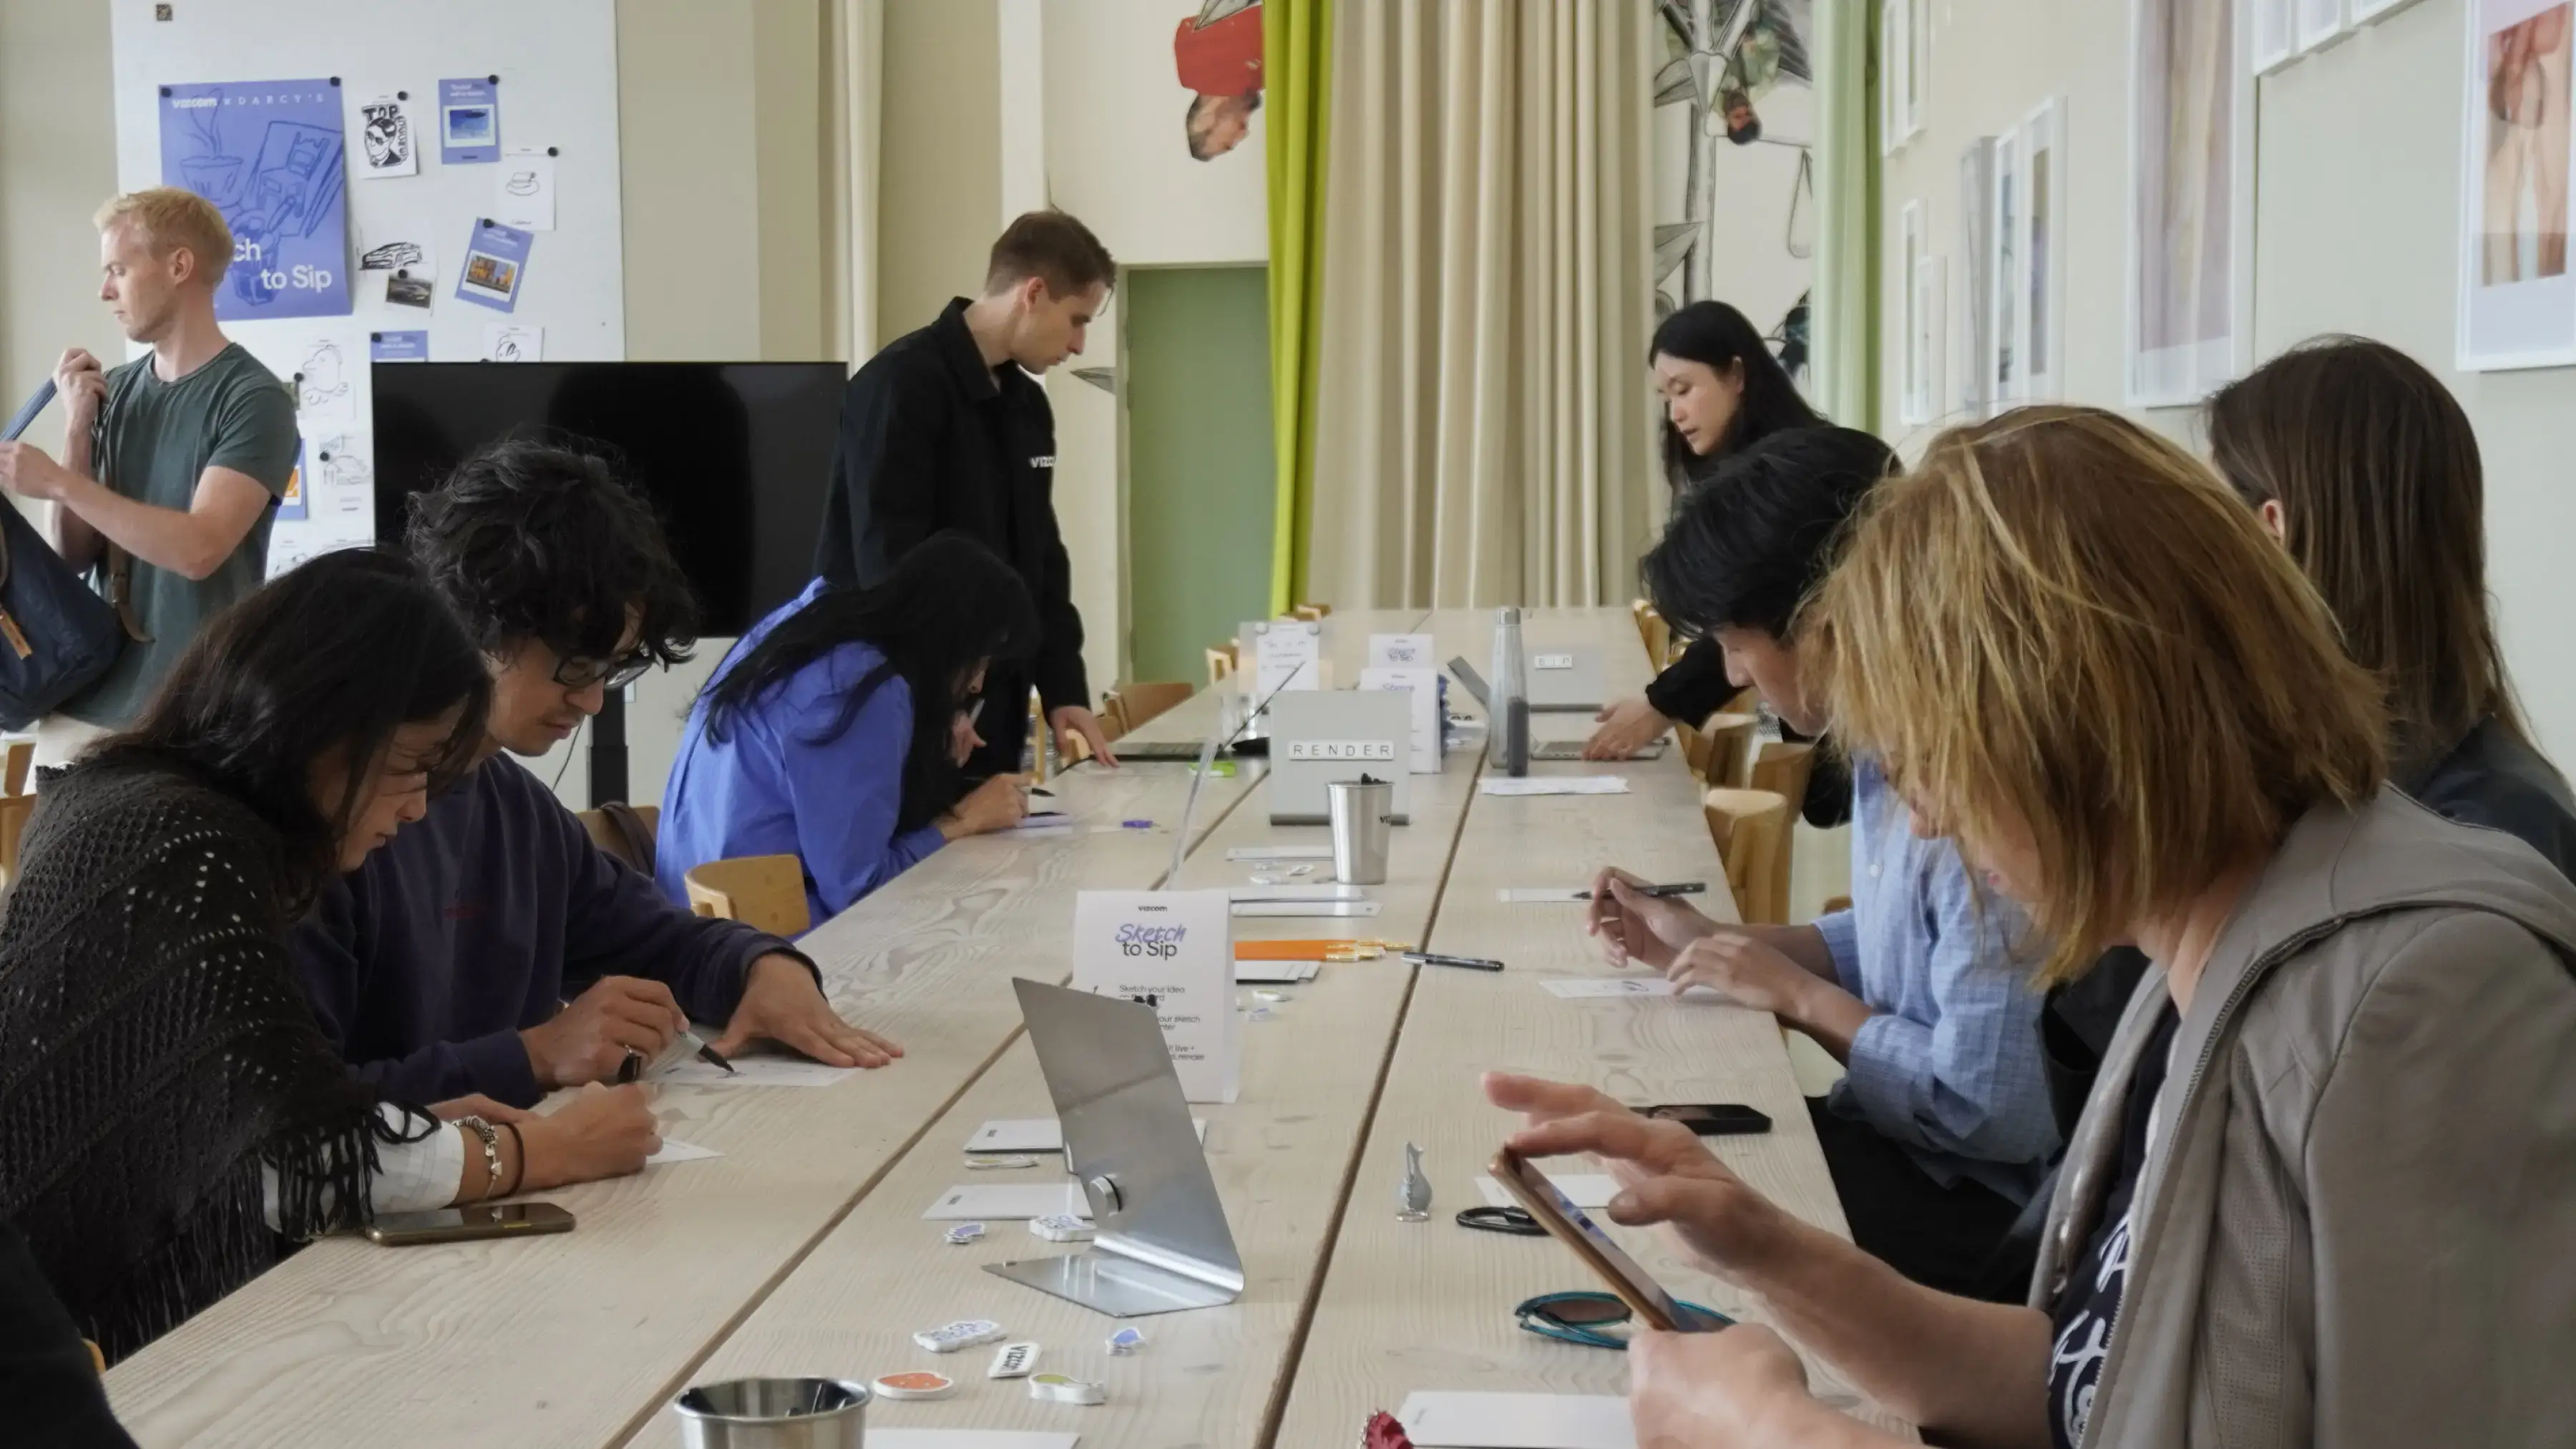
For one day during 3DaysofDesign in Copenhagen, Darcy's Cafe ran on a different currency — a sketch. Draw it, we'd render it live in Vizcom, and you'd walk out with a print — coffee included.
See how Kohler's industrial design team uses Vizcom to save time, speed up workflows, and create better work.
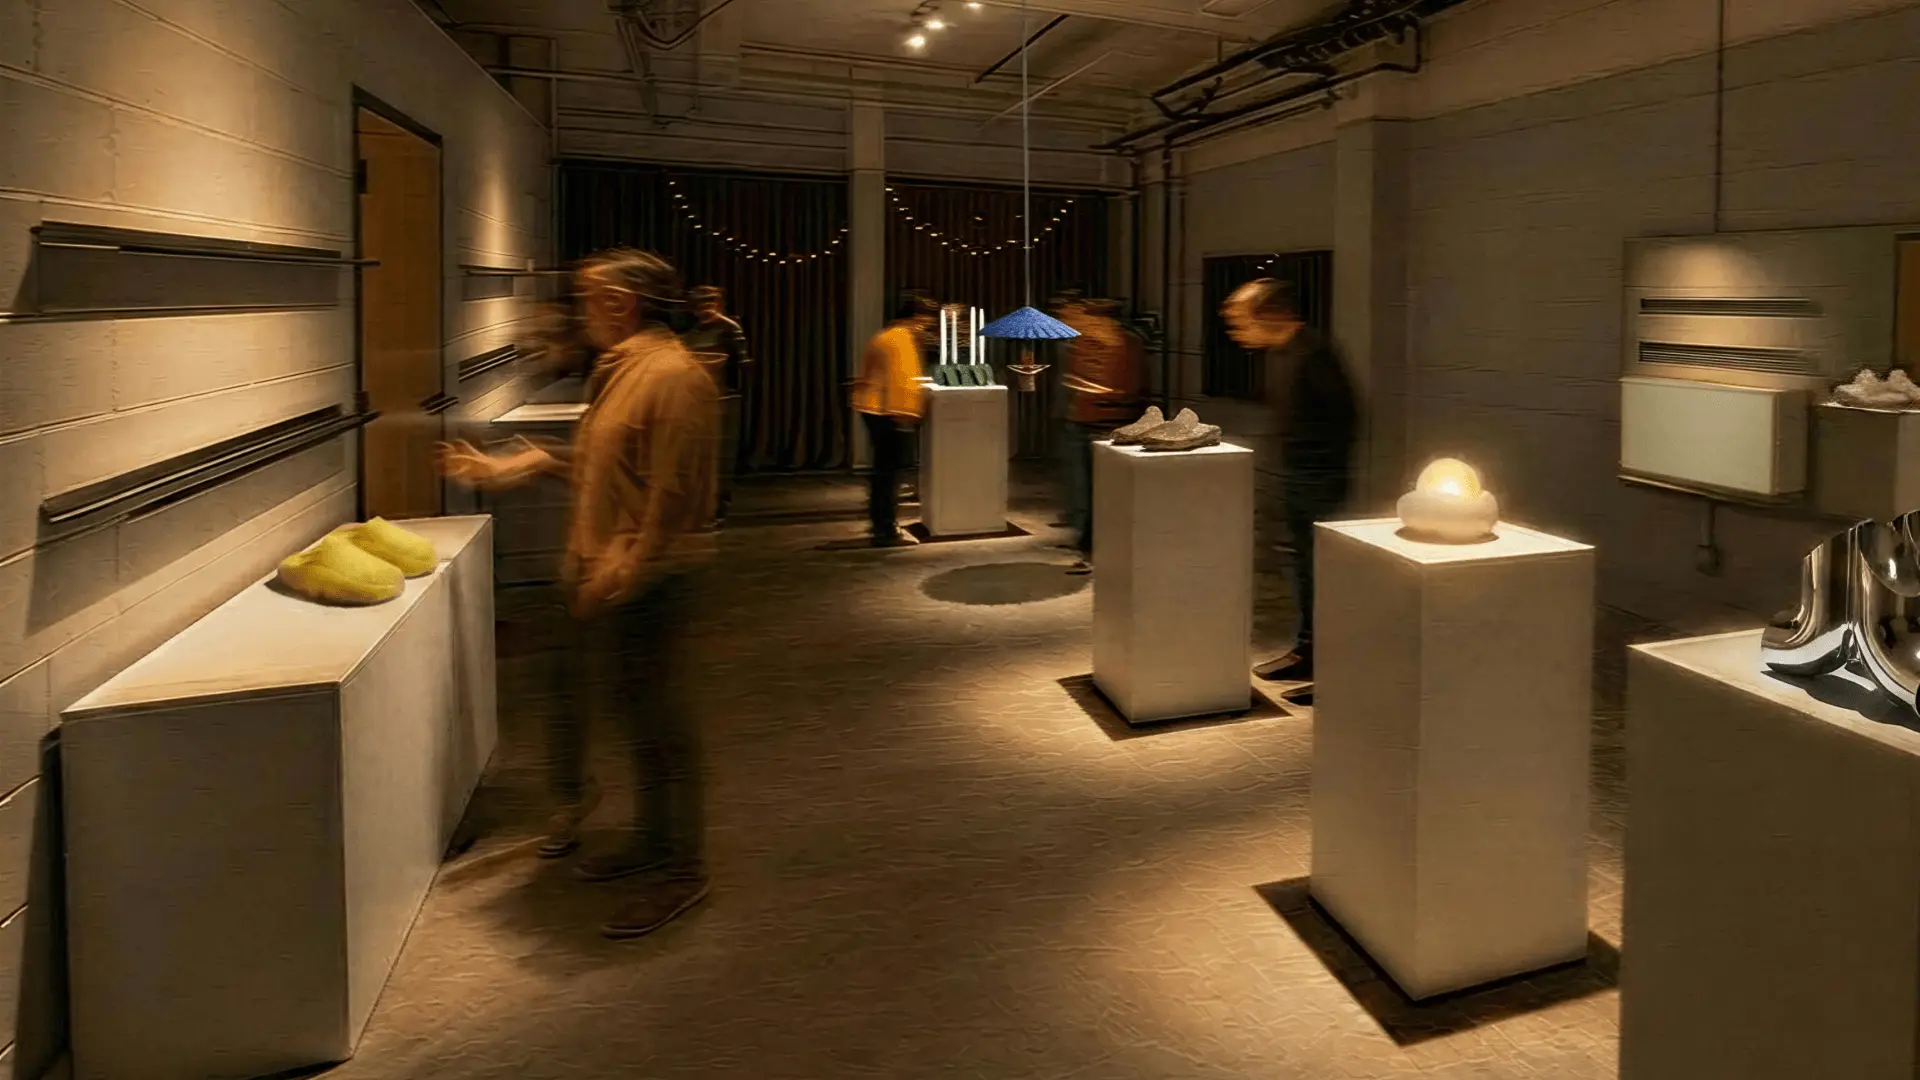
Explore the designs of Vizcom's San Francisco Design Week exhibition where furniture, footwear, lighting, and automotive concepts come to life through AI-powered visualization. Follow along as designers share the stories, sketches, and tools behind every piece on display.
Frequently asked questions
Yes of course! Our starter plan is completely free, no credit card required. This is a great plan to explore vizcom with.
We accept all major credit and debit cards.
Admins (paid) – can edit files, manage workspace settings, billing, teams, and invite members. Editors (paid) – can edit files but not manage settings, billing, or teams. Viewers (free) – can only view files in read-only mode.
Team billing is handled centrally by the Admin. All paid seats, whether Admins or Editors, are included in a single invoice under the same billing cycle, while Viewers remain free and do not affect the cost.
Yes, you can. An Admin can update the plan in the billing settings, and the switch will take effect on the next billing cycle at the annual rate.
Yes, you own everything you create in Vizcom. For free users, while Vizcom may use generated images to improve its services, it does not claim ownership of your designs, concepts, or original ideas—you keep full rights to them. For paid users, your images and designs remain entirely private and are only used to deliver the service. Every design, concept, and image you create or upload is fully yours and kept confidential.
Vizcom does not use your data to train AI models if you’re on a paid plan. Everything you create stays private and is only used to provide the service. Free users may have their generated images included to help improve Vizcom’s services, but even then, Vizcom does not claim ownership of your designs, concepts, or original ideas—you retain full rights.