
Fashion Croquis: The 9-Head System for Perfect Proportions
Master fashion croquis with the 9-head proportion system. Learn to build proportionally accurate templates that eliminate the "something's off" problem.
A well-built croquis cuts sketch time in half. Instead of redrawing the figure for every garment iteration, you work from a proportionally accurate template that handles body construction while you focus on designing clothes.
Fashion croquis templates standardize at 9 heads tall, deliberately exaggerating natural human proportions to emphasize garment silhouettes and fabric drape. Once you understand how these proportions work, you can build a library of poses that accelerate every collection you develop.
This guide covers how to construct proportionally accurate croquis figures, create pose variations that show garment movement, adapt proportions for different design categories, and choose between digital and hand-drawn workflows.
Fashion Figure Proportions, Defined
Three proportion systems dominate fashion illustration, each serving distinct purposes. The system you choose determines whether your sketches translate effectively to production or serve purely editorial purposes.
The 9-Head Standard
The 9-head proportion serves as the professional standard, taught as a baseline in fashion programs worldwide. Amiko Simonetti, whose croquis tutorials are widely referenced, teaches this system as the foundation for fashion illustration.
The 9-head system takes realistic human anatomy (approximately 7.5 heads tall) and elongates proportions. The additional 1.5 heads of height get distributed primarily through the legs and torso, creating that signature fashion illustration look where garments have vertical space to breathe and move.
When to Use Different Systems
Start with the 9-head croquis. Master this system first because it's what professional contexts expect. Once you've internalized the 9-head relationships, adjusting for specific body types or editorial purposes becomes straightforward.
Building Your Base Croquis Template
The 9-head system takes about 15 minutes to construct and works for every garment you'll sketch on it. The system divides total body height into nine equal units, where each unit measures exactly the height of the head from crown to chin.
Establishing the Vertical Axis
Start by drawing a straight vertical line down your page. This center axis maintains proportional balance throughout the construction.
At the top, sketch an oval for the head shape with the chin sitting on your baseline. Measure the distance from crown to chin. This single measurement becomes your fundamental unit for all subsequent proportions.
Mark nine equal divisions down your vertical axis using the head height as your measuring tool. Use a ruler or divider to keep measurements accurate. Inconsistent head units throw off all subsequent proportions.
Anatomical Landmarks
Place key landmarks along your vertical axis at these specific points:
These landmarks create the proportional framework that keeps all your garment sketches consistent.
Balance and Gesture Lines
The vertical axis establishes static balance, but gesture lines add life. A slight S-curve through the torso suggests natural weight distribution. The shoulder line and hip line should tilt in opposite directions when the figure's weight shifts to one leg.
For your base template, keep the gesture subtle. You want a foundation that works for multiple garment types without competing with the clothes you'll design on top of it.
Creating Pose Variations That Show Garment Movement
A single front-facing croquis limits what you can show. Professional templates include multiple poses and viewing angles so you can visualize how garments function when bodies move and rotate.
Essential Poses for Your Library
Front standing serves as your baseline for most garment development. Weight can distribute evenly or shift to one leg for a more natural stance.
Back view reveals construction details invisible from the front: back closures, yoke seams, vent placement, how the garment sits across shoulder blades.
Three-quarter view shows how garments wrap around the body. This angle reveals fit issues that flat front views hide.
Walking pose demonstrates how fabric moves. Skirts swing, trousers show their drape, jackets reveal how they button when the body is in motion.
Seated pose matters for garments that need to function in everyday life. How does the skirt behave when the wearer sits? Does the jacket bunch at the waist?
Testing Poses Without Redrawing
Building each pose from scratch takes time. Once you have a proportionally accurate base croquis, you can test how garments work across multiple poses more efficiently.
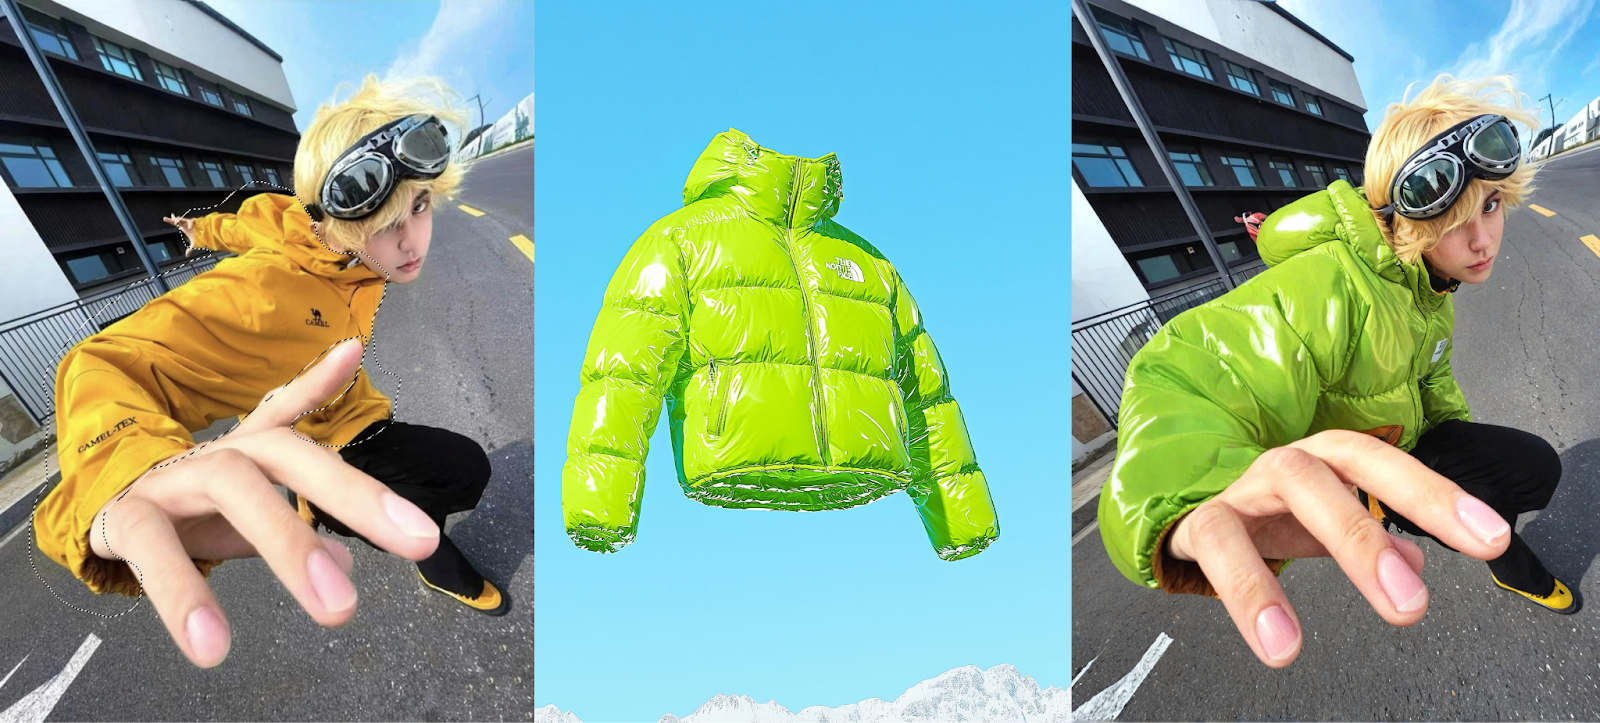
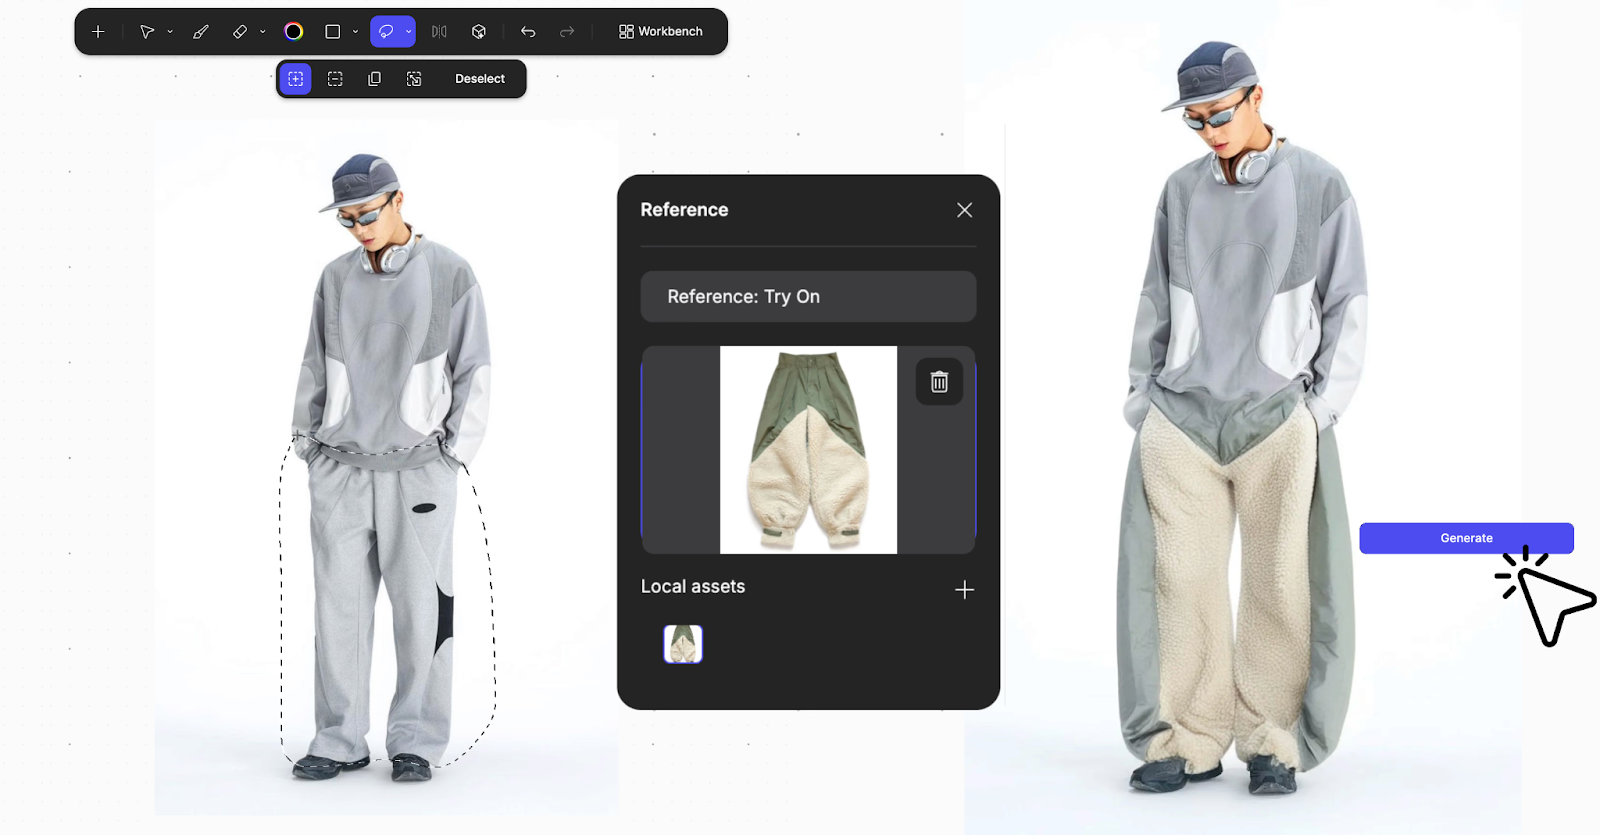
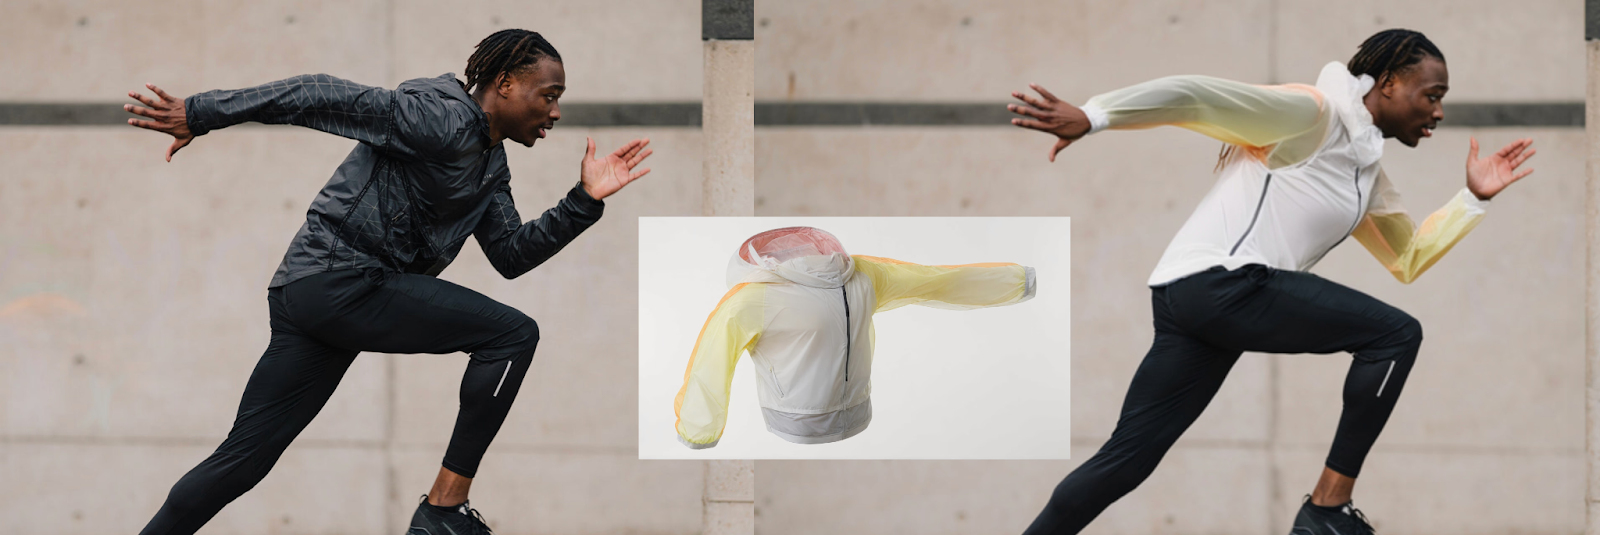
Vizcom lets you test garment concepts with Virtual Garment Try-On on multiple croquis poses without redrawing the base figure each time. Sketch your garment once, then evaluate how it reads across standing, walking, and dynamic poses.
Adapting Proportions for Different Design Categories
Different garment categories require different proportional emphases. Runway presentation demands drama. Technical documentation demands accuracy. Casualwear sits somewhere between.
Runway and Editorial
Editorial illustration pushes toward 10-head proportions for maximum visual impact. Legs stretch longer, waists cinch narrower, and the overall silhouette prioritizes dramatic presentation over realistic fit.
This exaggeration works when the goal is selling a mood or artistic vision rather than communicating construction details to a pattern maker.
Technical Flats and Production
Technical drawings pull back to 7-8 head proportions. These documents communicate with manufacturers, so realistic body relationships matter more than stylized presentation.
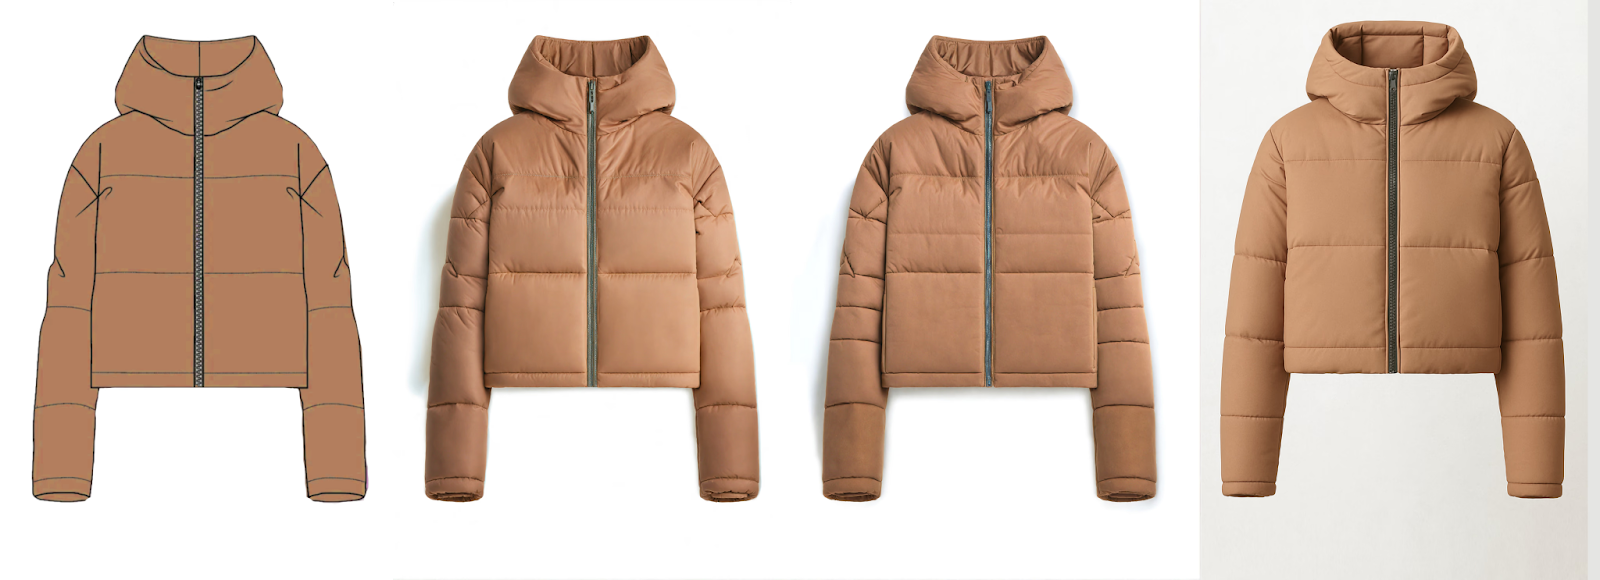
Technical flats often appear alongside the fashion figure, showing the garment laid flat with precise measurements and construction callouts. The croquis establishes how the garment looks on a body; the flat establishes how to make it.
Ready-to-Wear Collections
The 9-head standard works for most ready-to-wear development because it balances presentation appeal with enough accuracy to evaluate fit decisions. You can see how a shoulder seam sits, how a hemline falls, how proportions work together.
When designing for specific demographics (plus-size, petite, athletic), adjust your base croquis to match. A plus-size croquis might use 8-head proportions with fuller curves. A petite croquis maintains proportional relationships but scales the overall figure.
Digital vs. Hand-Drawn Croquis Workflows
Both approaches have legitimate places in professional practice. The question isn't which is better, but which serves your current purpose.
When Hand-Drawn Works Best
Hand-drawn croquis excel during early ideation when you're generating lots of rough concepts quickly. The friction of switching between tools slows the creative flow. Paper and pencil let you sketch, evaluate, discard, and sketch again without interruption.
Physical sketching also builds muscle memory for proportions. Fashion students typically spend significant time drawing croquis by hand before moving to digital tools because the physical practice internalizes proportional relationships.
When Digital Workflows Accelerate
Digital croquis templates shine when you need consistency across many garments or when you're moving toward presentation-ready output.
The Render feature turns rough croquis sketches into presentation-ready fashion illustrations. You focus on garment design rather than spending hours refining figure rendering. Your proportional accuracy carries through to the final output.
Custom Palettes maintain collection color consistency. Every garment variation renders with the same Pantone-accurate colorways, so you're comparing silhouettes and construction details rather than getting distracted by color drift between sketches.
Hybrid Approaches
Many designers sketch initial concepts by hand, then move to digital for refinement and presentation. The hand-drawn phase generates ideas; the digital phase evaluates and communicates them.
The Refine feature supports this hybrid workflow. Adjust pose or proportions on a rendered croquis without starting over. Test how a garment reads with slightly different shoulder placement or hip tilt without redrawing the entire figure.
Common Proportion Mistakes That Make Designs Look Off
You can see something's wrong, but you can't pinpoint exactly what's causing it. Usually, the problem traces back to one of these proportion errors.
Inconsistent Head Units
The most frequent error happens when head units measure inconsistently down the page. You're eyeballing measurements instead of using a tool. By the time you reach the feet, your ninth head unit doesn't match the first, and the entire figure looks stretched or compressed. Use a ruler, divider, or marked paper strip so every unit stays identical.
Misplaced Waistline
Beginners often place the waist too high or too low because they're drawing from memory rather than following the head-unit system. The waist belongs at Head 3, two head-lengths below the crown. Placing it at Head 2.5 or Head 3.5 throws off the entire figure even if you can't immediately identify why.
Shortened Legs
The 9-head system places legs significantly longer than realistic proportions. The crotch line sits at Head 4.5, meaning legs span 4.5 head units from hip to ground. That feels exaggerated when you first sketch it, so designers unconsciously shorten the legs. Trust the system. This elongation provides vertical space to display clothing details effectively.
Narrow Shoulders
Fashion figures need adequately proportioned shoulders to support garment visualization. Narrow shoulders make everything you draw look cramped and don't give you enough structure to show how jackets, coats, and structured garments actually fit. If your designs consistently feel squeezed, check shoulder width relative to overall proportions.
Neck Length Errors
At Head 1.5, the neck should be long enough to show necklines clearly but proportional to the head size. Too short, and collars bunch awkwardly. Too long, and the figure looks disconnected.
Verifying Proportions from Multiple Angles
Some proportion errors only become visible when you see the figure in three dimensions. Make 3D converts your rendered croquis into rotatable meshes. Verify how garment proportions work on the figure from front, side, and back angles. Catch fit issues before committing to detailed development.
Building Your Croquis Library
Strong croquis foundations let you explore more design directions with confidence. When proportions are reliable, you focus on what matters: the garments.
Build systematically. Start with a 9-head front-facing template, add back and three-quarter views, then include walking and seated poses. Adapt proportions for your target demographics.
The time invested in accurate templates pays back every sketch. You evaluate silhouettes and compare design directions on equal footing.
Try Vizcom to see how Render, Custom Palettes, and 3D help you test garment concepts across multiple poses and proportions.
Explore
Explore more blog posts & resources to get inspired
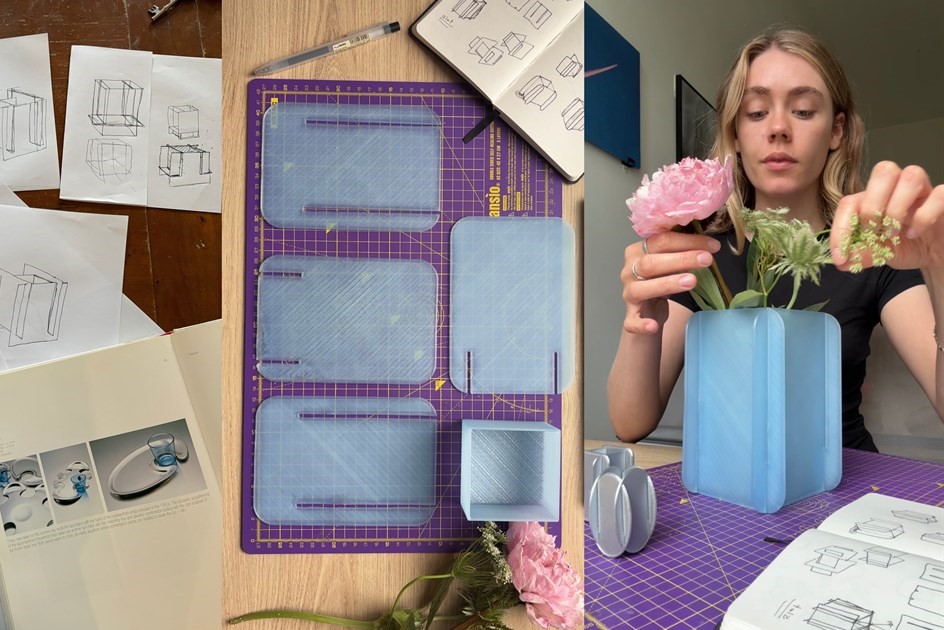
Designer Tara Harcombe took her idea all the way from the first pencil lines to the finished piece, with Vizcom in the loop the whole way.
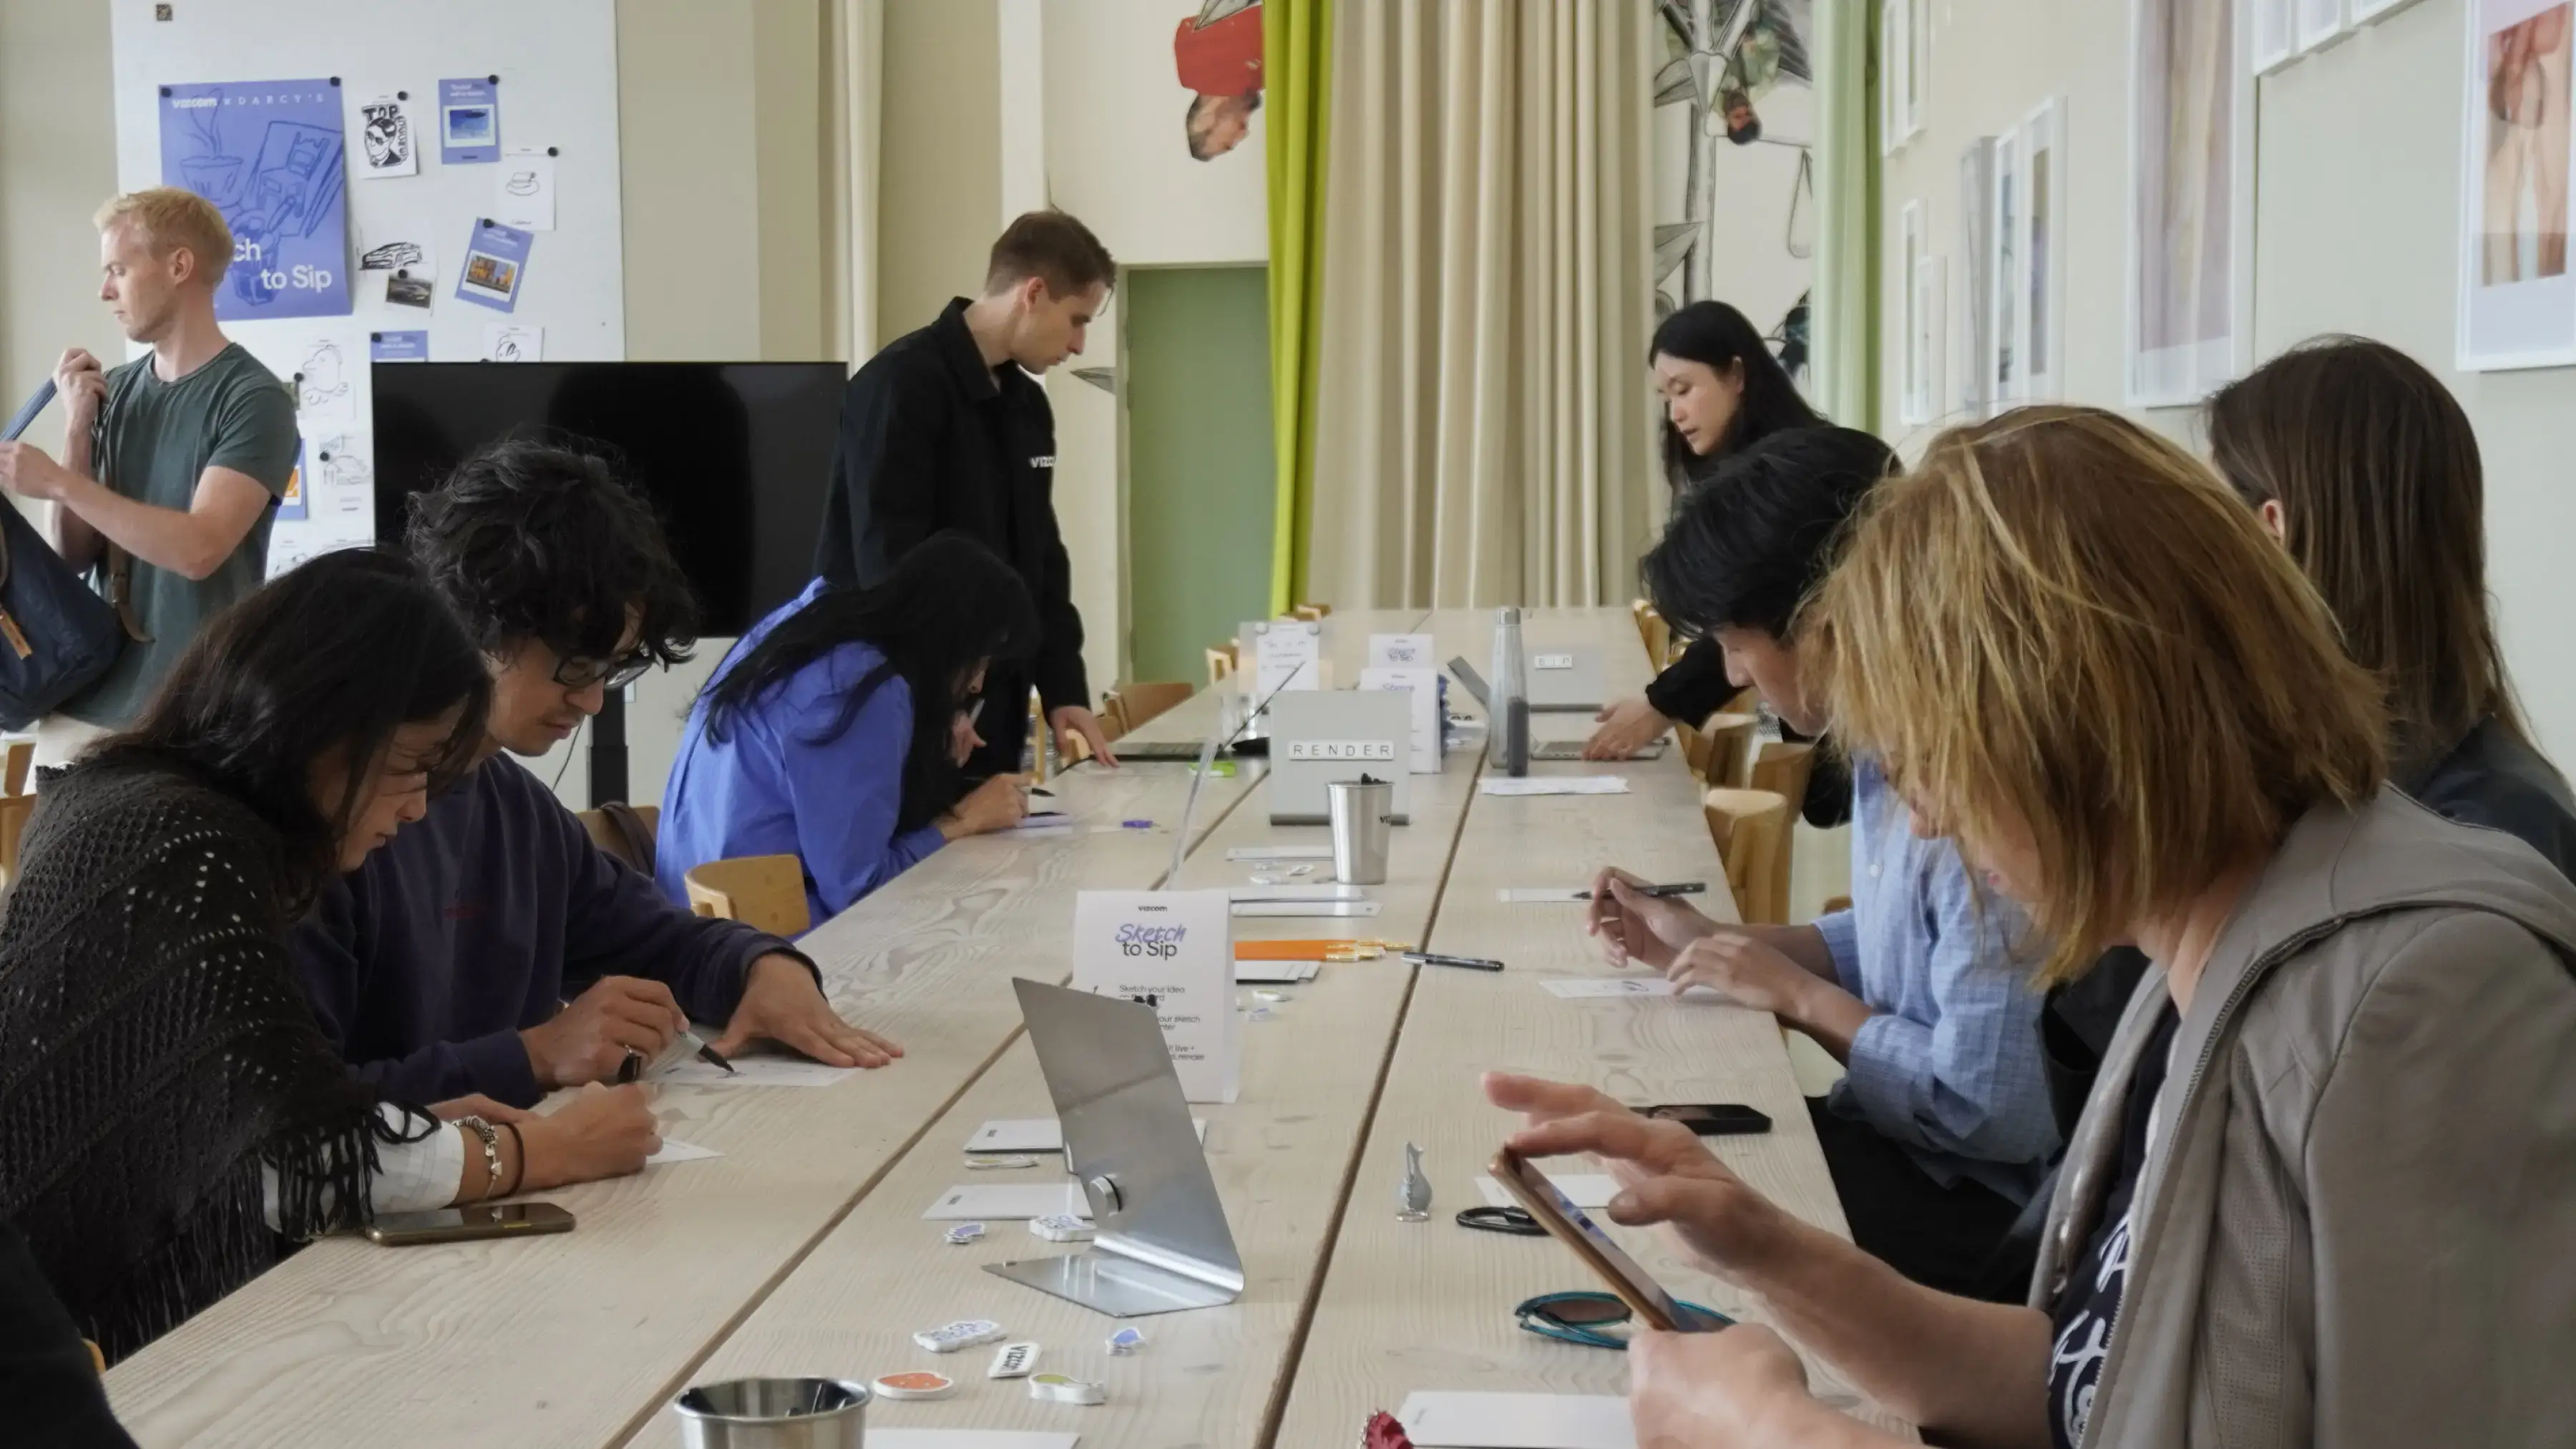
For one day during 3DaysofDesign in Copenhagen, Darcy's Cafe ran on a different currency — a sketch. Draw it, we'd render it live in Vizcom, and you'd walk out with a print — coffee included.
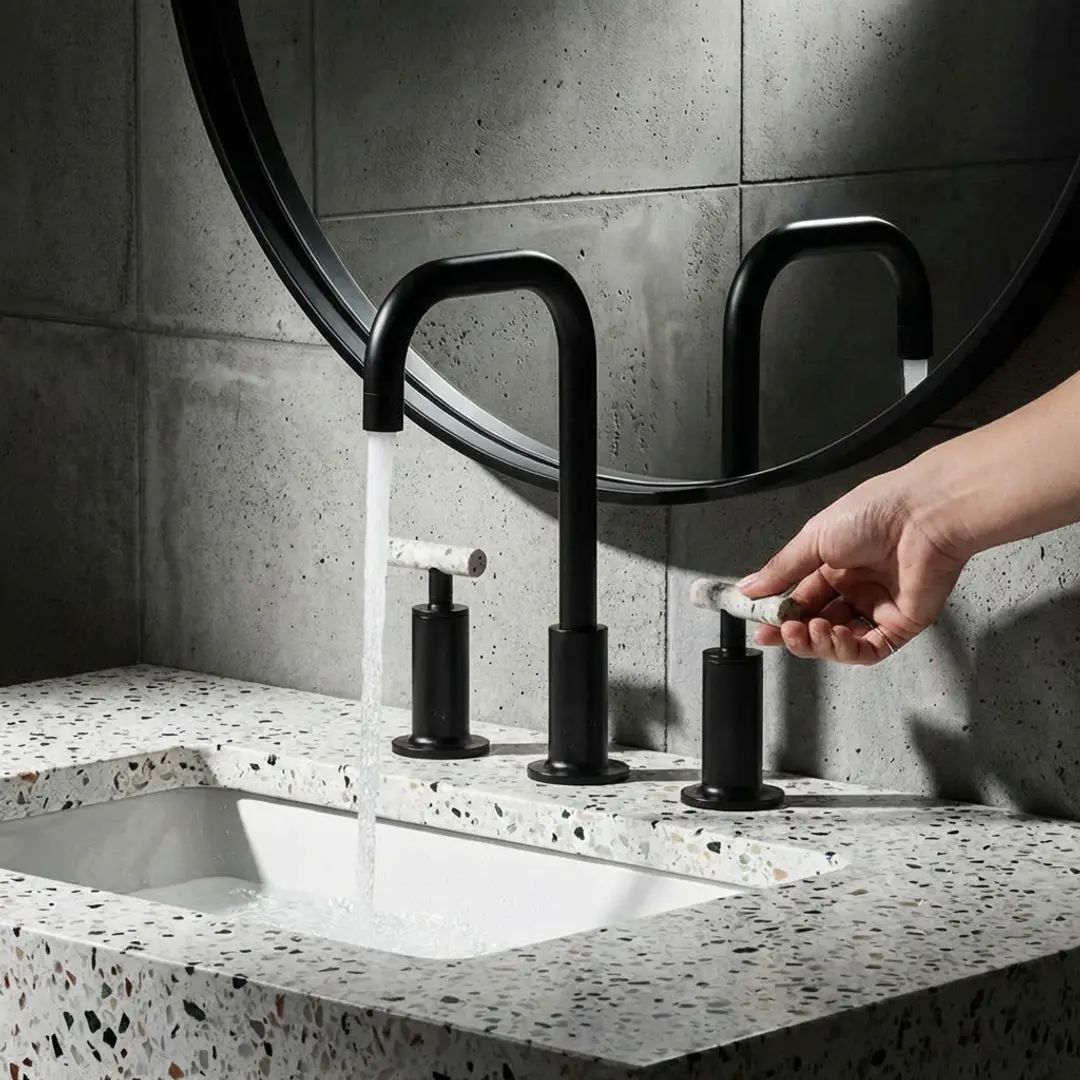
See how Kohler's industrial design team uses Vizcom to save time, speed up workflows, and create better work.
Explore the designs of Vizcom's San Francisco Design Week exhibition where furniture, footwear, lighting, and automotive concepts come to life through AI-powered visualization. Follow along as designers share the stories, sketches, and tools behind every piece on display.
Frequently asked questions
Yes of course! Our starter plan is completely free, no credit card required. This is a great plan to explore vizcom with.
We accept all major credit and debit cards.
Admins (paid) – can edit files, manage workspace settings, billing, teams, and invite members. Editors (paid) – can edit files but not manage settings, billing, or teams. Viewers (free) – can only view files in read-only mode.
Team billing is handled centrally by the Admin. All paid seats, whether Admins or Editors, are included in a single invoice under the same billing cycle, while Viewers remain free and do not affect the cost.
Yes, you can. An Admin can update the plan in the billing settings, and the switch will take effect on the next billing cycle at the annual rate.
Yes, you own everything you create in Vizcom. For free users, while Vizcom may use generated images to improve its services, it does not claim ownership of your designs, concepts, or original ideas—you keep full rights to them. For paid users, your images and designs remain entirely private and are only used to deliver the service. Every design, concept, and image you create or upload is fully yours and kept confidential.
Vizcom does not use your data to train AI models if you’re on a paid plan. Everything you create stays private and is only used to provide the service. Free users may have their generated images included to help improve Vizcom’s services, but even then, Vizcom does not claim ownership of your designs, concepts, or original ideas—you retain full rights.