What Is Rapid Prototyping? A Designer's Guide
Rapid prototyping is the practice of quickly creating models to test and validate design decisions through iterative build-test-refine cycles before committing to production. Visual prototyping (sketches to renderings) and physical prototyping (3D prints to working models) work together to answer different questions at different stages of development.

Rapid prototyping is the practice of quickly creating models to test and validate design decisions before committing to production.
Traditional rendering workflows force teams into an uncomfortable tradeoff: explore more concepts and risk missing deadlines, or commit early and hope you picked the right direction. Rapid prototyping compresses the feedback loop between idea and test, letting you evaluate more directions in less time.
What Does Rapid Prototyping Mean for Product Designers?
The key word is "rapid," but it refers to the speed of iteration, not just the speed of making one prototype. You're building, testing, learning, and refining in cycles that move fast enough to inform your decisions while you can still act on them.
Most design teams work through two distinct phases:
- Visual prototyping: Sketches become renderings, renderings become digital models. You evaluate form, proportion, materials, and aesthetics before anything gets built.
- Physical prototyping: 3D prints, CNC parts, or cast models test fit, function, and manufacturing feasibility. You're validating whether something works in the real world.
Visual vs. Physical Prototyping
A rendered concept can look perfect on screen and still fail the moment someone holds it. The weight feels wrong, the grip doesn't fit a human hand, or the button placement makes sense visually but becomes awkward in use. Physical prototypes reveal what screens cannot.
But here's the trap: jumping to physical prototyping too early burns budget on directions that should have been killed in visual review. The goal isn't to choose one approach over the other but to sequence them so each prototype, visual or physical, answers the right question at the right time.
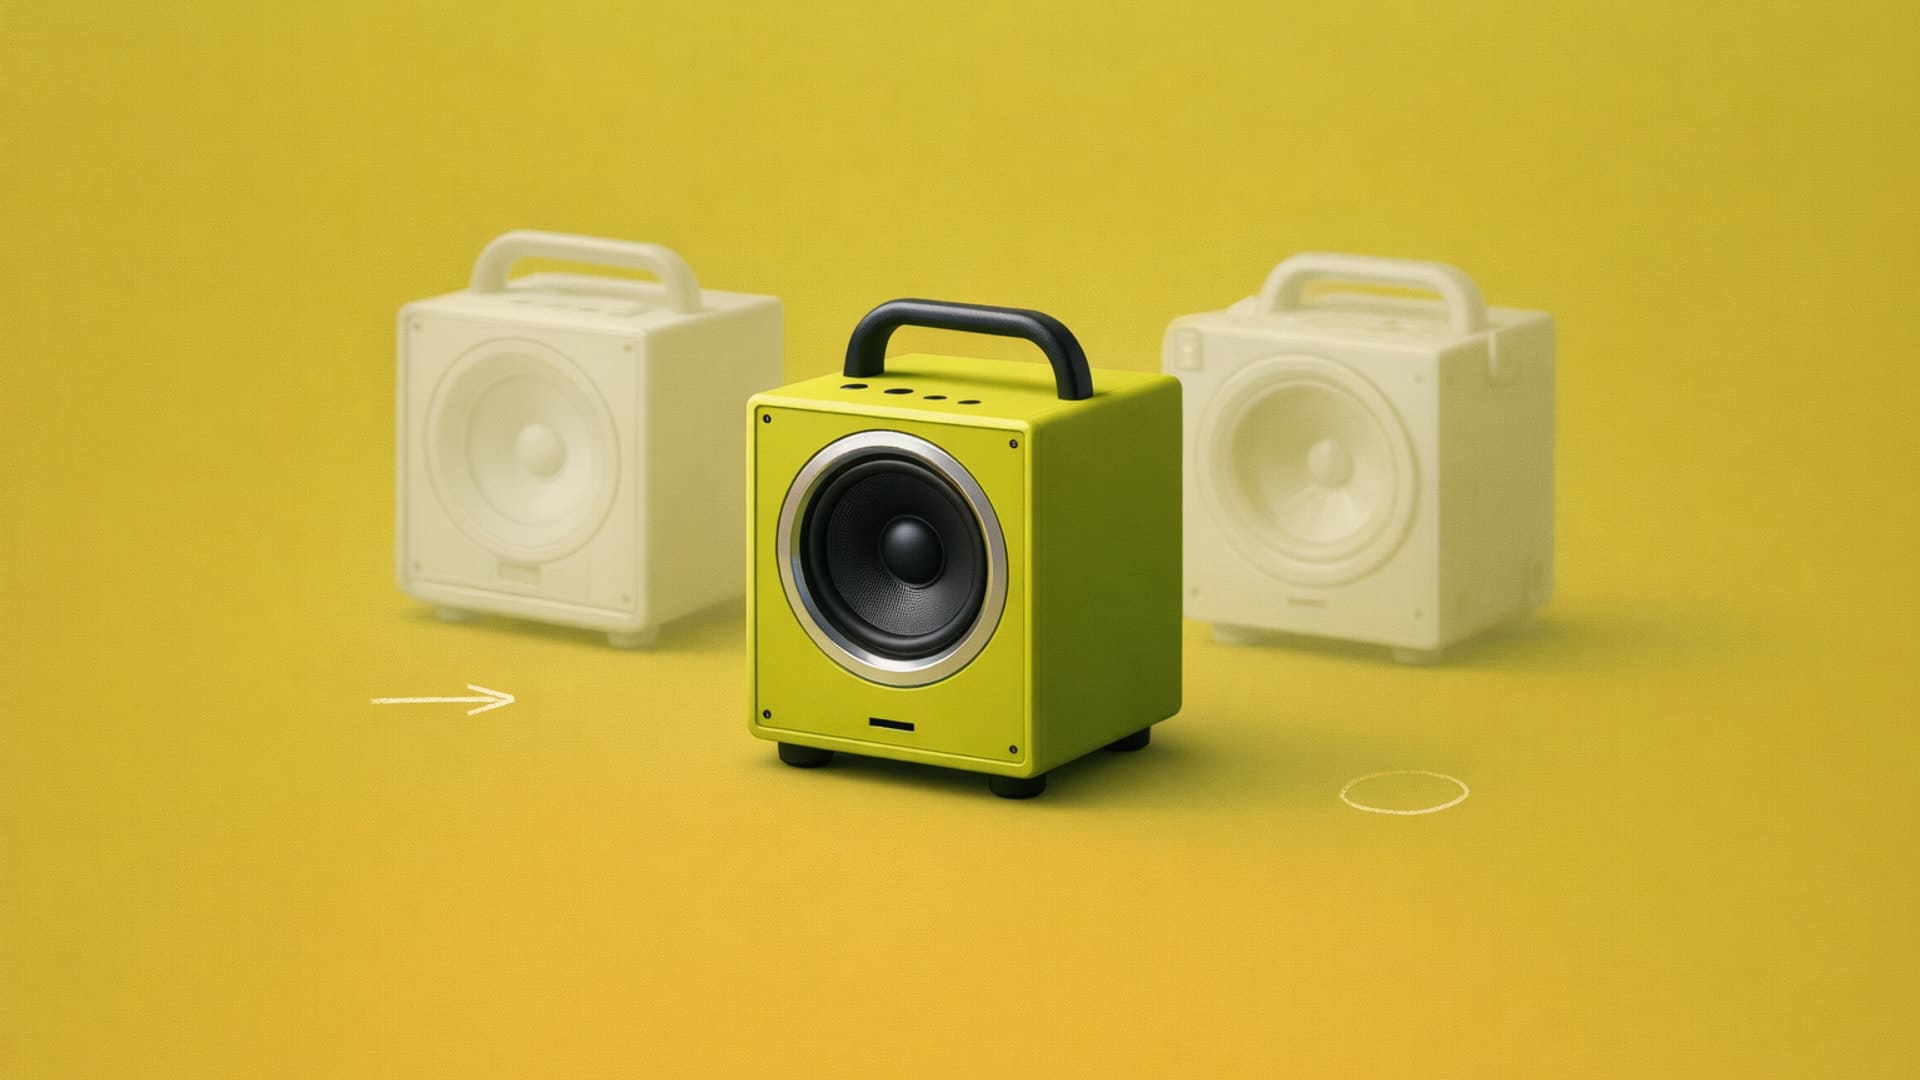
A tool like Vizcom, for example, lets designers move from sketch to photorealistic rendering in seconds. That means you can visually prototype dozens of directions before deciding which ones warrant physical builds. The constraint shifts from "how many can I render?" to "which directions actually have potential?"
How Does the Rapid Prototyping Process Work?
Rapid prototyping follows a loop with three stages that repeat until you land on the right direction:
- Build: Create a prototype, whether a sketch, a digital rendering, a 3D-printed part, or a functional model. The fidelity depends on what question you're trying to answer.
- Test: Evaluate against your criteria. Does the form language work? Do proportions feel right? Does it function as intended? Do stakeholders (clients or internal decision-makers) understand what they're looking at?
- Refine: Adjust based on what you learned and build the next iteration.
Each iteration should answer a specific question. If you're not learning something new, you're not prototyping; you're just making variations. A successful iteration solves a specific problem you identified in the previous version. Maybe the proportions felt off, so this iteration adjusts the ratio between elements. Maybe the form language wasn't reading clearly, so you're simplifying the surface transitions.
Types of Rapid Prototyping
Low-fidelity prototypes are quick sketches, paper models, and rough 3D prints. They're best for early exploration, testing broad direction, and getting team alignment. Speed matters more than polish at this stage.
Medium-fidelity prototypes are rendered concepts, basic functional models, and CMF studies that show color, material, and finish options. They're best for stakeholder presentations and narrowing down directions. You need enough polish to communicate intent clearly, but you're not committing to final details yet.
High-fidelity prototypes are production-quality renders, functional working models, and looks-like/works-like prototypes that closely resemble the finished product. They're best for final validation, user testing, and manufacturing prep.
Rapid Prototyping Methods
Different methods serve different purposes:
Rapid Prototyping Use Cases
Rapid prototyping looks different depending on the industry, but the core principle remains the same: test ideas faster than traditional workflows allow. Here's how designers apply these methods across verticals:
Automotive and Transportation
Vehicle design requires evaluating proportions, surface transitions, and character lines across hundreds of sketches before any CAD work begins. Rapid visual prototyping lets automotive designers explore exterior styling, interior layouts, and component designs fast.
Teams use AI-powered rendering to quickly test paint finishes, trim materials, and lighting scenarios, then move promising directions into 3D-printed scale models or full-size clay mockups for physical validation. Vizcom 2D-to-3D capabilities let automotive designers generate textured meshes directly from sketches, bridging the gap between ideation and digital modeling.
Footwear
Sneaker and footwear designers iterate rapidly on silhouettes, sole geometries, and material combinations. A single shoe project might explore 50+ colorways and material options before narrowing to production candidates.
Rapid prototyping compresses this exploration, letting designers visualize Pantone-accurate colors and realistic material textures before committing to physical samples. The Color Match feature in Vizcom maintains brand-accurate colors from sketch to render, which is critical for footwear brands where color consistency across product lines is non-negotiable.
Apparel and Fashion
Fashion designers use rapid prototyping to visualize garments before cutting fabric. Tech pack development benefits from quick renders that show how materials drape, how seams interact, and how colorways will look in context. For teams working with clients or internal stakeholders who need to approve directions quickly, visual prototypes communicate intent far better than flat sketches alone.
Industrial Design and Consumer Electronics
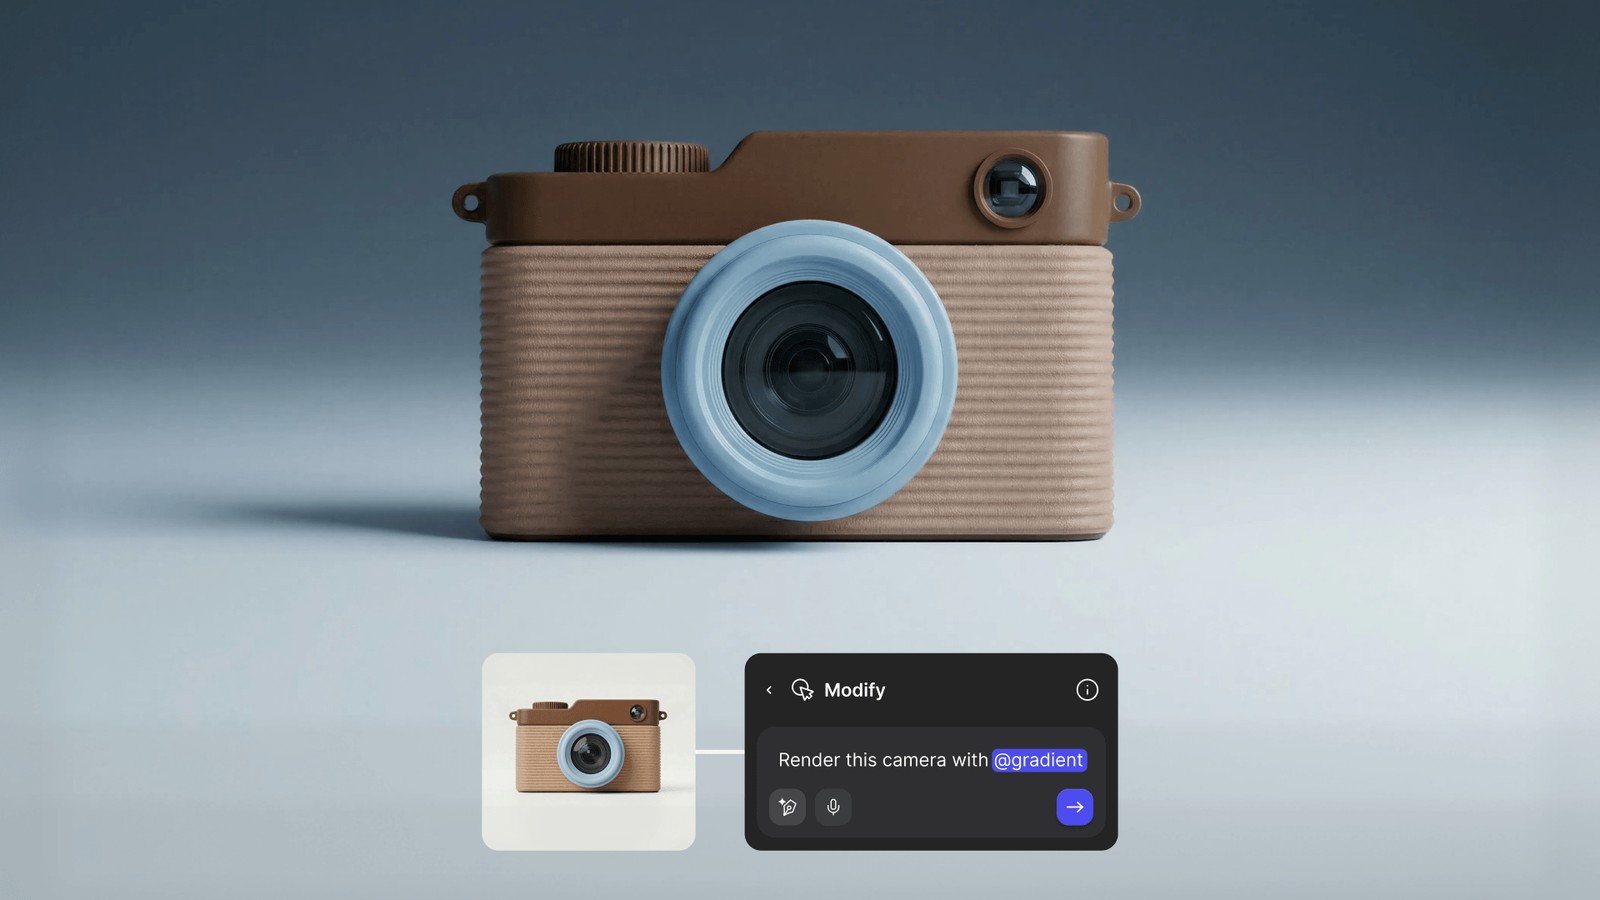
Product designers developing everything from kitchen appliances to wearable devices rely on rapid prototyping to evaluate ergonomics, interface layouts, and manufacturing feasibility. Visual prototyping catches proportion issues early, while physical prototypes validate button placements, grip comfort, and assembly sequences. The Modify feature in Vizcom lets designers explore shape variations, material swaps, and perspective changes without starting over.
Gaming and Entertainment
Character designers and environment artists use rapid prototyping to explore visual directions quickly. When designing props, vehicles, or architectural elements for games, the ability to render concepts in multiple styles helps teams align on aesthetic direction before committing to 3D modeling. The Animate feature in Vizcom, for instance, adds motion to static concepts, helping teams communicate how characters move or how products function in context.
How Do You Speed Up Your Prototyping Workflow?
Find your bottleneck. Is it getting from sketch to render? Render to physical? Physical to feedback? Focus your effort on the slowest step first. For most product designers, the visual prototyping phase is where time disappears. You're waiting for renders, feedback, and to see if a direction works.
Match fidelity to the question. Don't polish what doesn't need polishing yet. A rough sketch answers "does this direction have potential?" just fine. A polished render is overkill until you've earned that level of investment.
Build iteration into your schedule. Plan for multiple rounds, not one big reveal. Projects that assume they'll get it right on the first pass are projects that run late and over budget.
Invest in tools that compress the slowest steps. If rendering is your bottleneck, AI-powered tools can cut that step from hours to seconds, meaning more iterations, better decisions, and faster timelines without sacrificing quality. A chair designer using Vizcom, for example, was able to ideate, refine, 3D print, and iterate in just 48 hours, a timeline that would have taken weeks with traditional tools.
Make Rapid Prototyping Part of Your Workflow
Rapid prototyping is about compressing the gap between idea and test. The faster you can see whether a direction works, the better your final design will be, and the less time you'll waste on concepts that were never going to make it.
Whether you're working on an internal product team pushing against aggressive timelines or an agency presenting options to clients, the principle is the same: prototype early, prototype often, and don't wait until you're "sure" to start testing. Certainty comes from iteration, not from thinking harder before you begin.
With AI-powered rendering that turns sketches into photorealistic concepts in seconds, 2D-to-3D generation that bridges the gap between digital and physical prototyping, and Custom Palettes that maintain your brand's design language across every variation, Vizcom removes the friction from visual prototyping so you can spend more time designing and less time waiting.
Try Vizcom and see how much faster your next project can move.
Explore
Explore more blog posts & resources to get inspired
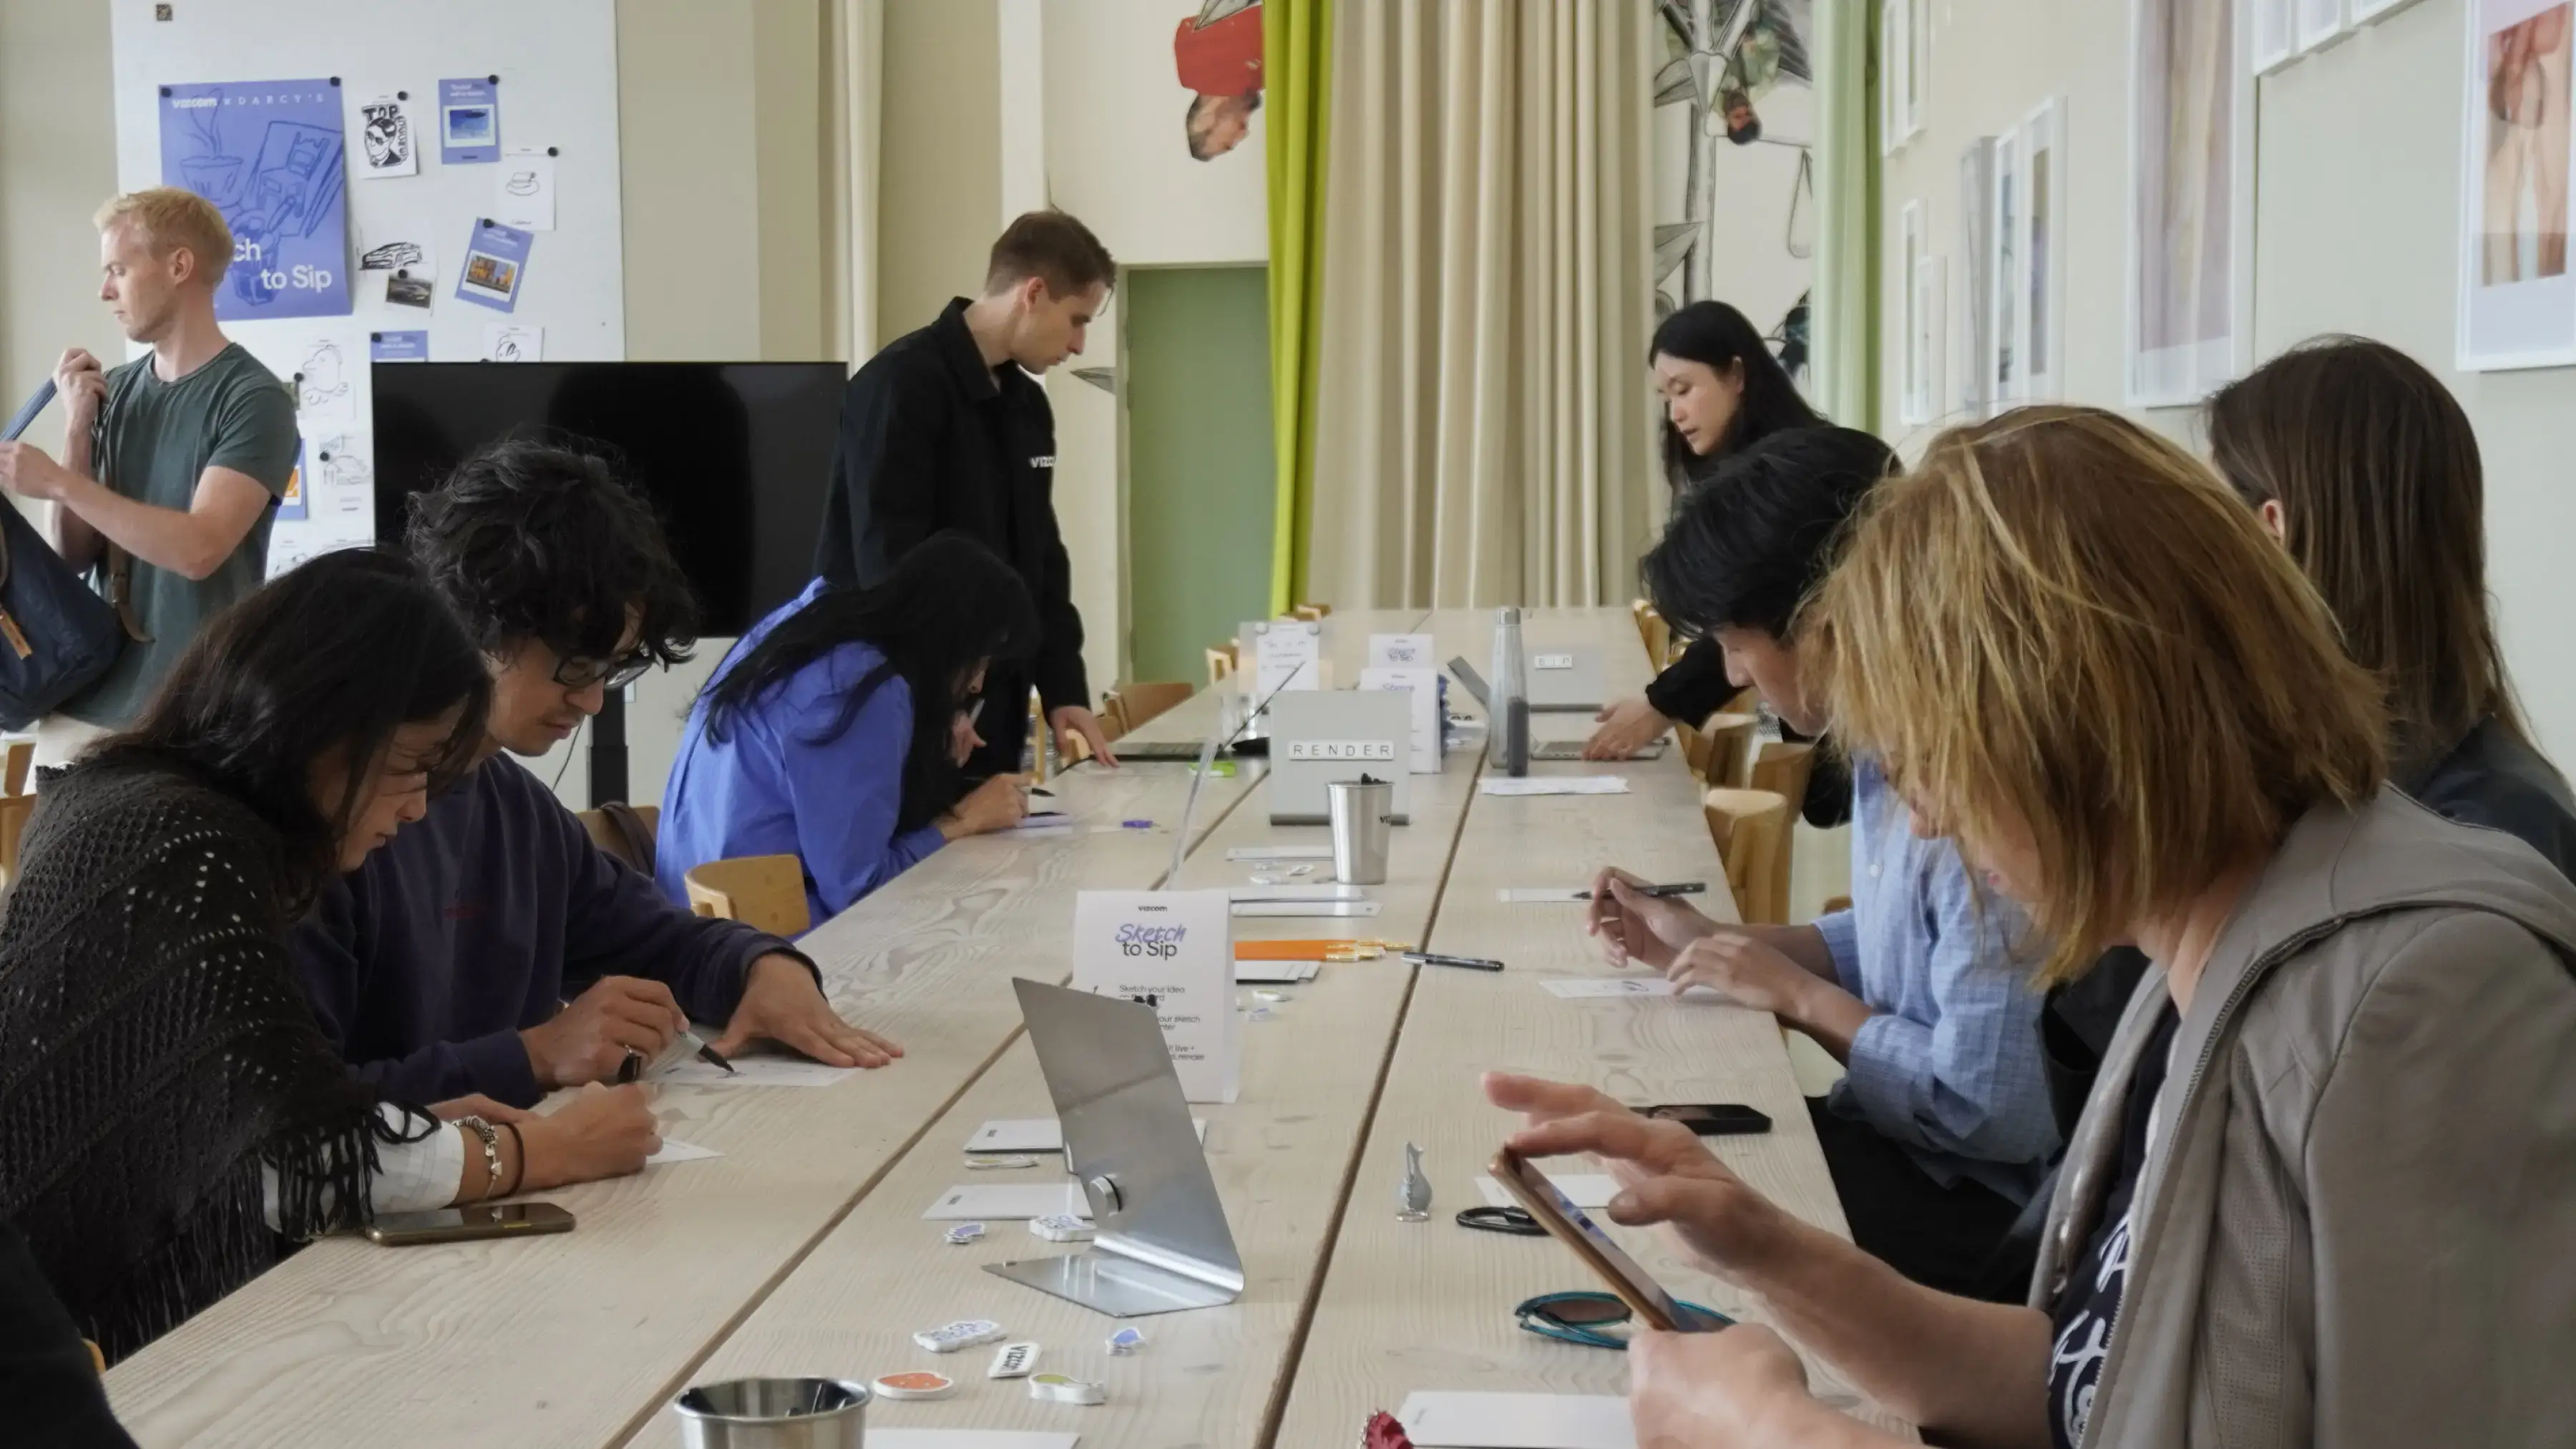
For one day during 3DaysofDesign in Copenhagen, Darcy's Cafe ran on a different currency — a sketch. Draw it, we'd render it live in Vizcom, and you'd walk out with a print — coffee included.
See how Kohler's industrial design team uses Vizcom to save time, speed up workflows, and create better work.
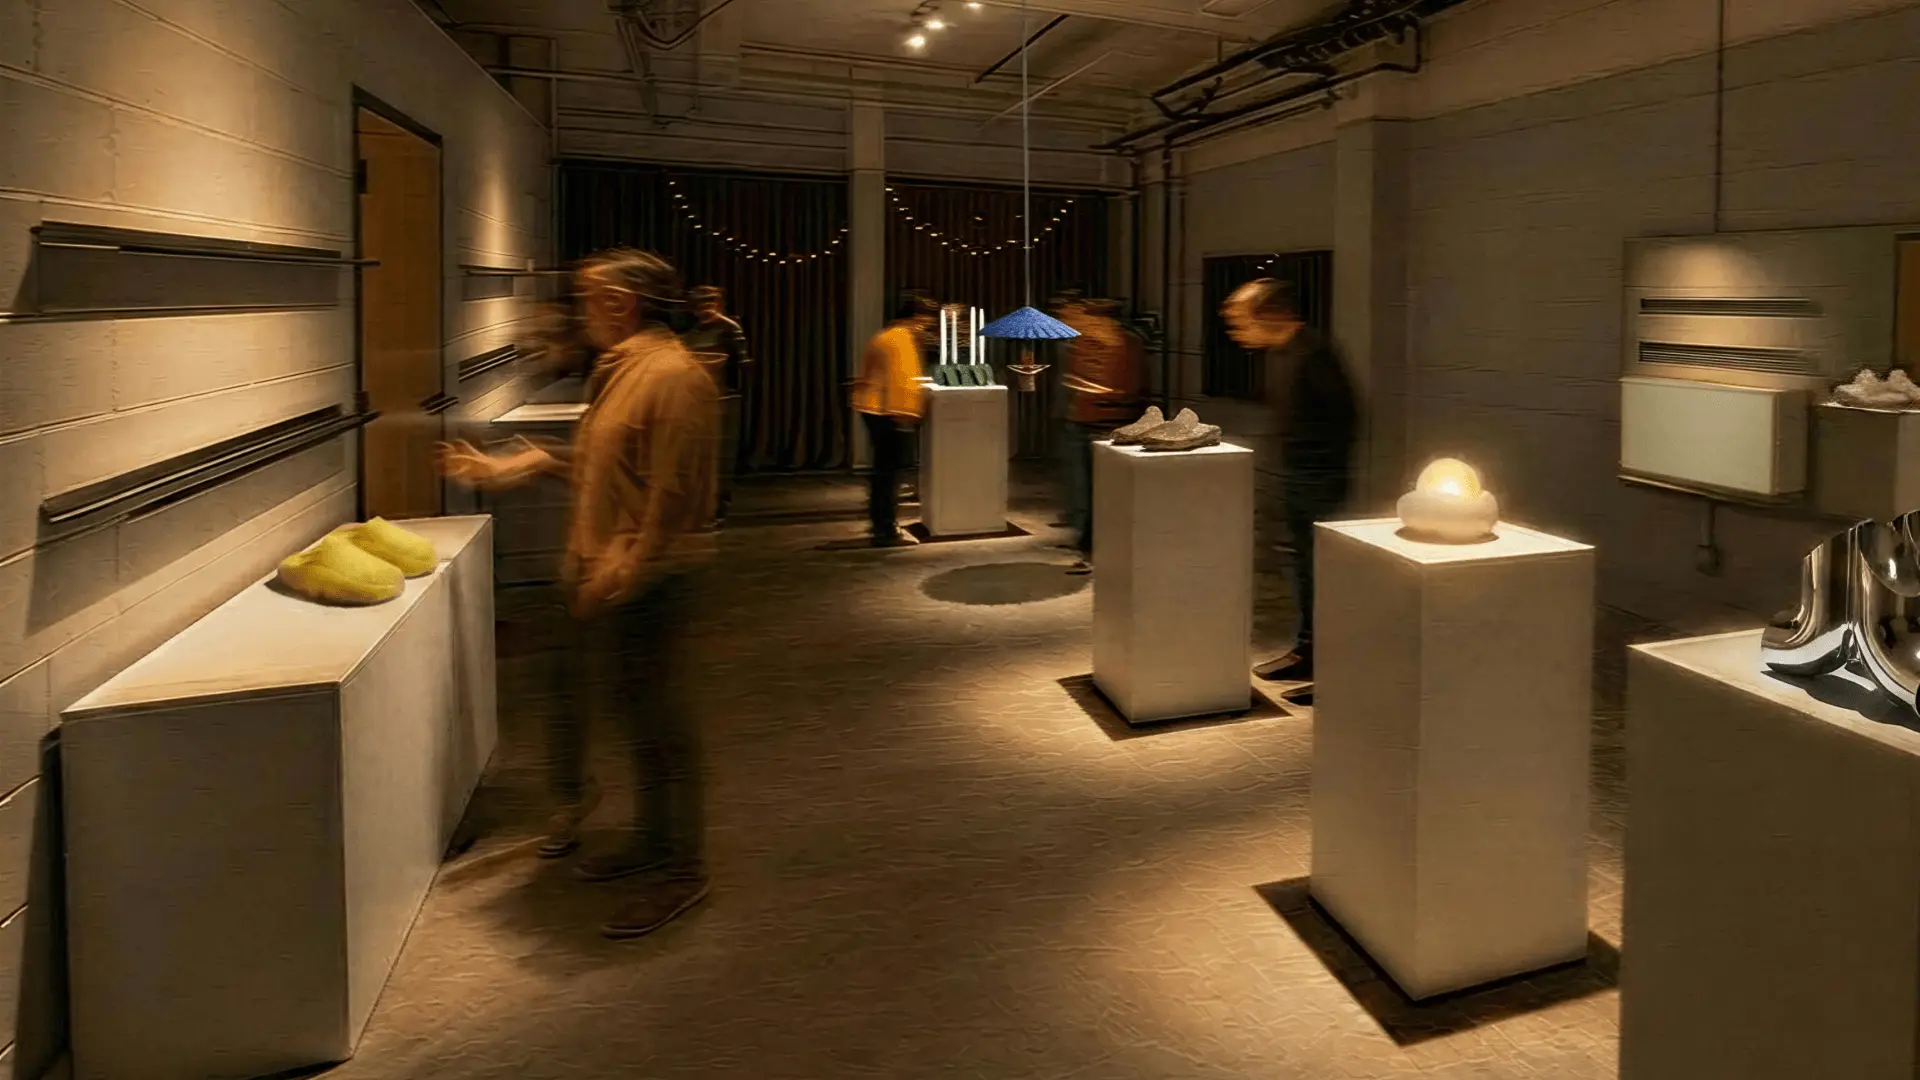
Explore the designs of Vizcom's San Francisco Design Week exhibition where furniture, footwear, lighting, and automotive concepts come to life through AI-powered visualization. Follow along as designers share the stories, sketches, and tools behind every piece on display.
Frequently asked questions
Yes of course! Our starter plan is completely free, no credit card required. This is a great plan to explore vizcom with.
We accept all major credit and debit cards.
Admins (paid) – can edit files, manage workspace settings, billing, teams, and invite members. Editors (paid) – can edit files but not manage settings, billing, or teams. Viewers (free) – can only view files in read-only mode.
Team billing is handled centrally by the Admin. All paid seats, whether Admins or Editors, are included in a single invoice under the same billing cycle, while Viewers remain free and do not affect the cost.
Yes, you can. An Admin can update the plan in the billing settings, and the switch will take effect on the next billing cycle at the annual rate.
Yes, you own everything you create in Vizcom. For free users, while Vizcom may use generated images to improve its services, it does not claim ownership of your designs, concepts, or original ideas—you keep full rights to them. For paid users, your images and designs remain entirely private and are only used to deliver the service. Every design, concept, and image you create or upload is fully yours and kept confidential.
Vizcom does not use your data to train AI models if you’re on a paid plan. Everything you create stays private and is only used to provide the service. Free users may have their generated images included to help improve Vizcom’s services, but even then, Vizcom does not claim ownership of your designs, concepts, or original ideas—you retain full rights.