The Art of Product Design Prompts: From Sketch to Stunning Render
Write better product design prompts for photorealistic renders. Tips on materials, lighting, and structure by category.

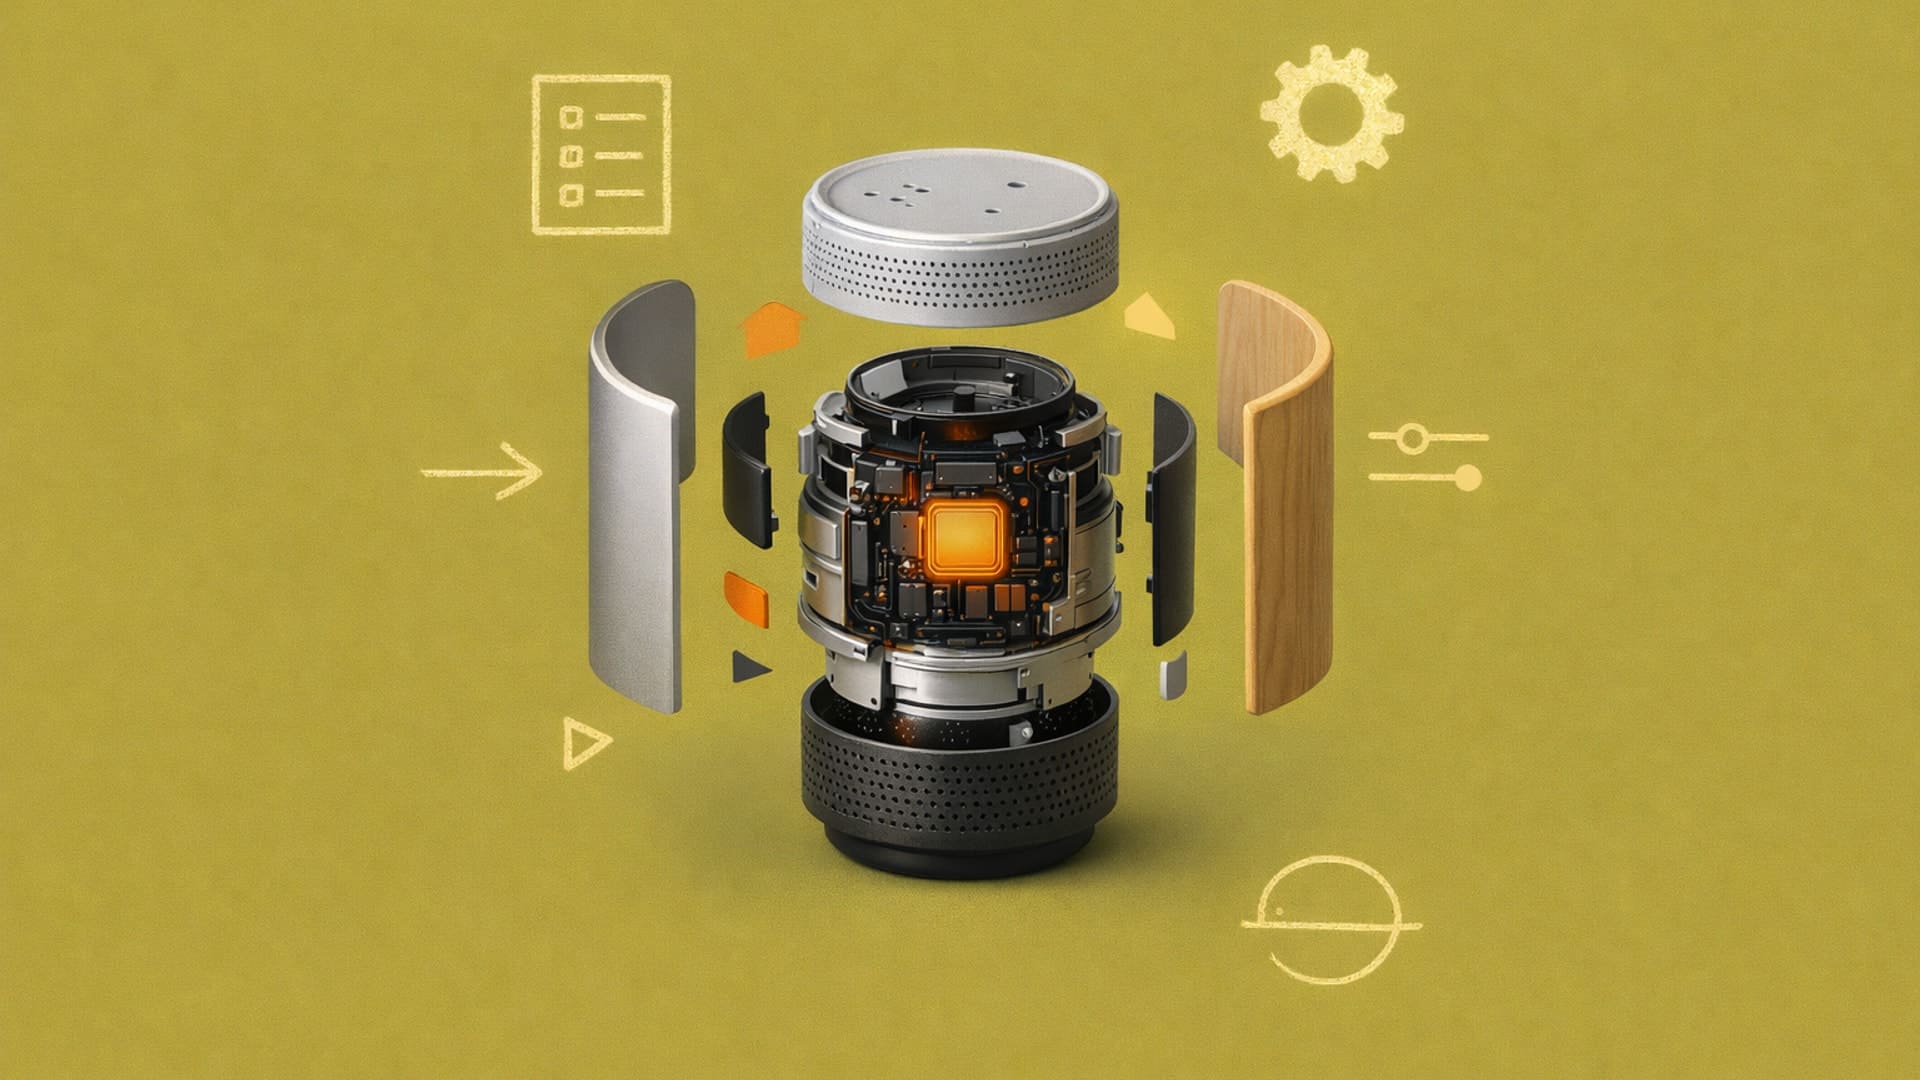
Sketch-to-render tools can convert your linework into photorealistic images in seconds instead of hours, but the quality of those renders depends on how precisely you specify materials, lighting, and technical details. Material type, surface finish, and lighting setup are the technical details that determine whether your renders look production-ready or generic. Getting these right separates prompts that produce client-ready renders from those that waste your time.
In short: Your sketch makes the creative decisions about form and proportion. Prompts specify how to present your design with accurate materials and lighting.
The Prompt Structure That Actually Works
The specificity of your prompt determines how realistic and accurate your sketch rendering appears. Most rendering systems require detailed prompts to produce production-ready results, typically following a six-element structure:
- Product type: The object you're designing (smartphone, chair, speaker)
- Material specifications: Surface materials and finishes (brushed aluminum, matte ABS plastic)
- Lighting setup: How the scene is illuminated (studio lighting, 45-degree angle)
- Camera angle: Viewing perspective (front view, three-quarter angle)
- Background: Environmental context (white seamless, dark studio)
- Quality parameters: Resolution and style markers (8k, product photography)
Here's an example of a detailed prompt following this structure:
Wireless speaker, brushed aluminum body with fabric grille, studio lighting on 45-degree angle, white seamless background, product photography, 8k resolution
Each element in this prompt serves a purpose:
- "Brushed aluminum" specifies both the metal type and surface finish, guiding how light interacts with the material.
- "Studio lighting on 45-degree angle" controls shadow depth and highlight placement.
- "8k resolution" and "product photography" reinforce the photorealistic rendering approach.
The more precisely you describe what you want, the more precisely the output can deliver it.
That said, Vizcom is optimized to extract maximum quality from your sketch without requiring lengthy, complex prompts. Because your sketch already defines the form, proportions, and design intent, the prompt focuses purely on materials and presentation context, giving you control to explore dozens of finish options in minutes.
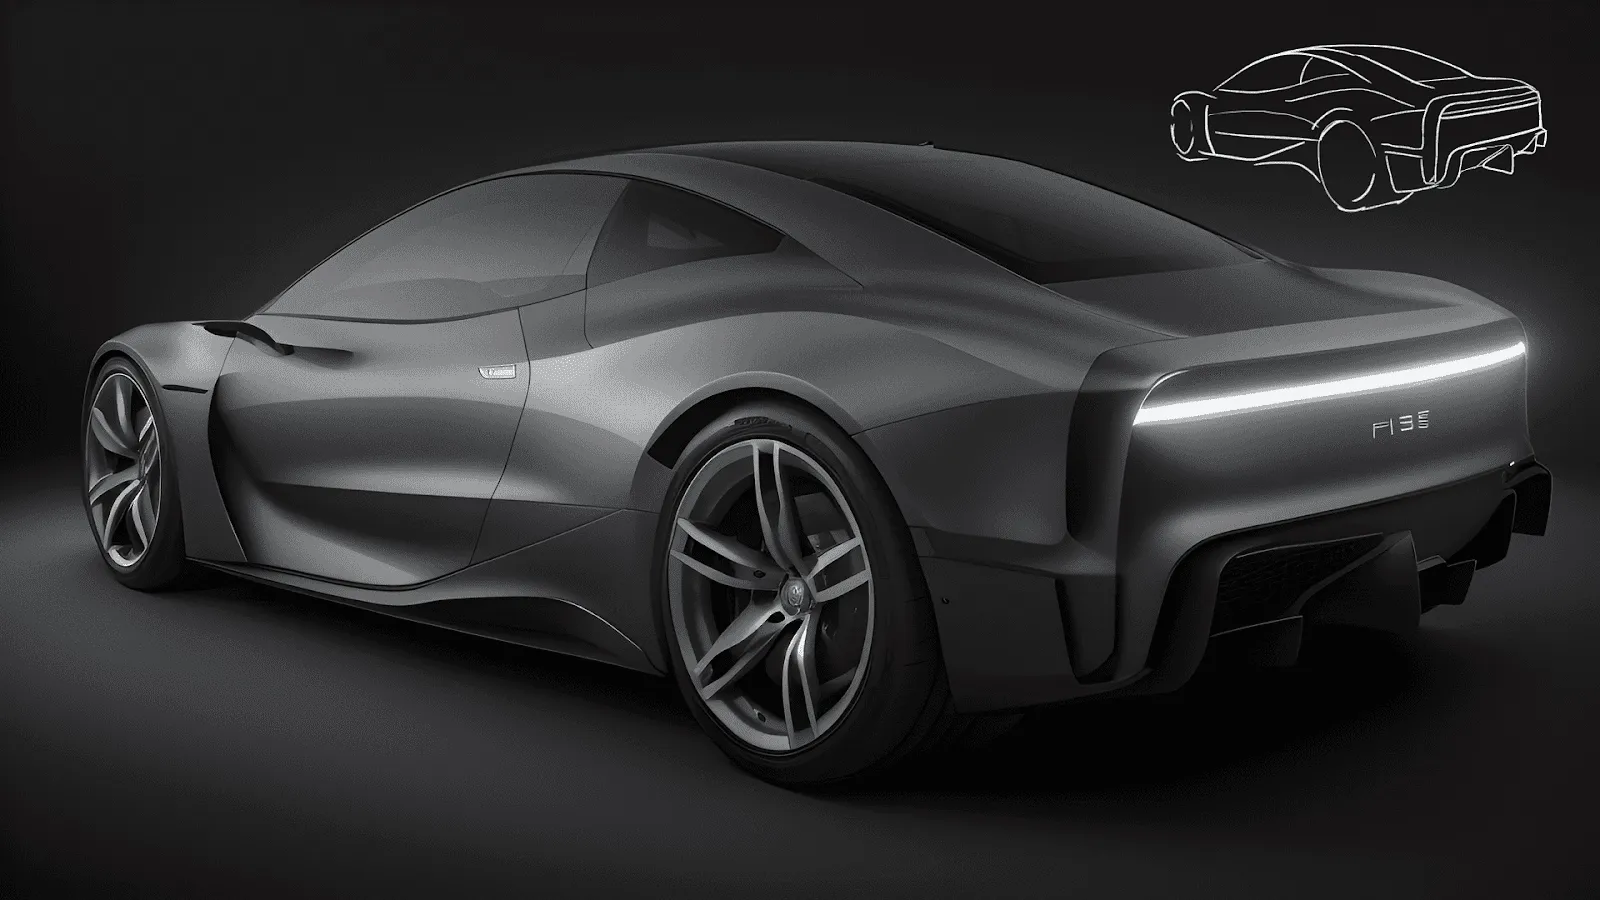
Here's an example. The prompt "(hyperrealistic:1.5), silver, modern, electric supercar, Car design concept, (depth of field:1.5), blurred background (dark studio scene:1.8), glowing light blue taillight, monochrome scene, glossy, reflective surfaces, colorful particles flying around, DSLR" produced the following results:
In Vizcom, you can use the same sketch with a shorter prompt (“Silver concept car, dark studio”) to produce similar results:
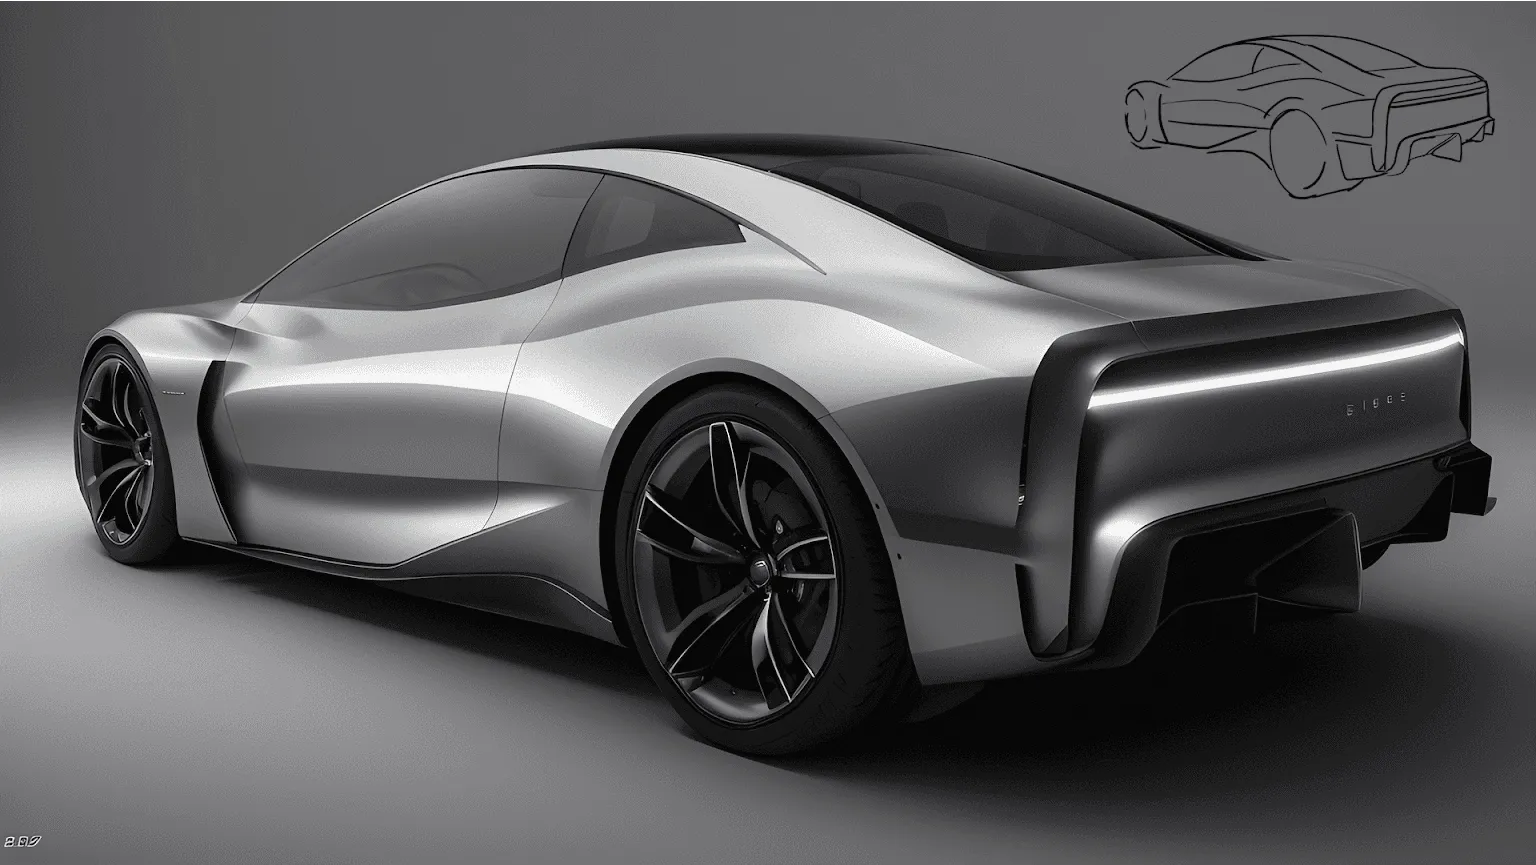
That's because Vizcom's model is trained to interpret your sketch as the primary design input. The prompt enhances rather than defines, specifying surface treatment and environment while your linework handles everything else. This separation between form and surface is where sketch-to-render workflows differ from text-only generation, where you'd otherwise fight to maintain design intent while describing materials.
Consumer Electronics and Industrial Design Prompts
Material precision determines whether consumer electronics renders look production-ready or generic. Surface finishes become brand differentiators in competitive markets: brushed versus anodized aluminum, matte versus glossy plastic, and textured versus smooth finishes separate renders that communicate manufacturing intent from those that read as concept art.
For a smartphone concept:
Smartphone design, brushed titanium frame with ceramic back panel, edge-to-edge OLED (Organic Light-Emitting Diode) display, minimalist aesthetic, 45-degree angle view, studio lighting with soft diffusion, white background, product photography, shot on 50mm lens f/2.8, ultra detailed, 8k resolution
"Brushed titanium frame" combines a metal type with a precise surface finish: directional surface texture that influences how light interacts with the frame. Similarly, "ceramic back panel" specifies both material properties and reflectivity characteristics.
These specific descriptors guide the model toward accurate material rendering in ways that generic terms can't.
For wireless earbuds:
Wireless earbuds, matte white ABS (Acrylonitrile Butadiene Styrene) plastic shell with soft-touch coating, ergonomic form, studio lighting, floating composition, 8k
"Soft-touch plastic" with its rubberized coating is a specific surface treatment that changes how plastic materials appear and feel. Specify whether you want glossy ABS, textured polycarbonate, or soft-touch finishes to get production-ready renders instead of generic output.
For a smartwatch:
Smartwatch, stainless steel case with brushed finish, sapphire crystal display, leather band with visible stitching detail, 45-degree angle, dramatic side lighting, dark studio background, product photography style, photorealistic, 8k resolution
For a desk lamp:
Desk lamp, brushed aluminum arm with brass joints, matte black finish, Scandinavian minimalist design, warm LED (Light-Emitting Diode) glow, white background, 8k product photography
Furniture Design Prompts
Material specifications in furniture prompts communicate manufacturing intent, cost positioning, and how the piece will age over time. Include concrete finish descriptors, like matte finish, polished, or natural wood grain visible, rather than generic references.
For a mid-century chair:
Armchair, solid walnut frame with visible wood grain, organic curved forms, leather seat cushion, warm studio lighting, product photography context
For wood furniture, include details like "solid walnut construction" or "natural oak grain" to ensure authentic wood surfaces with visible grain texture, rather than generic finishes that might lack proper material representation.
For a contemporary dining table:
Dining table, light oak construction with natural grain pattern, minimalist design, clean lines, matte finish, natural window light, architectural photography
For an industrial side table:
Industrial side table, powder-coated steel tube frame in matte black, circular walnut top with live edge and natural grain visible, mixed materials aesthetic, studio lighting with soft diffused light, white seamless background, product photography style, 8k, photorealistic, ultra detailed, --ar 1:1
The "live edge" detail on the wood and "powder-coated steel" specification for the metal help ensure accurate material rendering in generated designs.
For an upholstered sofa:
Sofa with textured linen upholstery in natural beige and solid oak legs with natural finish, front three-quarter view, residential interior setting with soft diffused lighting, studio photography style, 8k resolution
Effective textile specification layers three components: material type (like "silk" or "linen"), drape characteristics (such as "flowing" or "structured"), and surface qualities (like "matte" or "textured"). This layered approach works because fabric rendering depends on accurate material properties. Different materials and finishes create dramatically different drape and surface detail behavior.
Automotive Design Prompts
Automotive prompts require precision across paint finishes, camera settings, and environmental context. Specifying "metallic deep blue" rather than just "blue" produces renders that match real automotive finishes, since metallic, pearl, matte, and candy coat paints each interact with light differently. Camera specifications like focal length and aperture signal photographic authenticity, while environmental context — e.g., mountain roads, dark studios, or showroom floors — sets the presentation mood.
For a sports car exterior:
Photo of a sports car with metallic deep blue paint, chrome details, aggressive stance, shot on Sony mirrorless camera, 50mm lens f/2.8, golden hour lighting, mountain road setting, ultra detailed, 8k
A 50mm lens at f/2.8 creates specific depth-of-field characteristics that product photographers reference for photorealistic renderings. These details signal how to generate photographic authenticity rather than a rendered aesthetic.
For a luxury sedan:
Luxury sedan with pearl white finish and high-gloss clear coat, brushed aluminum trim details, shot on DSLR with 85mm lens f/4 aperture, studio lighting setup with soft rim light and subtle shadows, showroom environment, photorealistic render, ultra detailed, 8k
The 85mm lens at f/4 provides moderate depth-of-field, keeping key vehicle details in focus while allowing background softening.
For an automotive interior:
Car interior with quilted full-grain leather seats in cognac brown with contrast stitching, carbon fiber trim accents, brushed aluminum details, digital instrument cluster, studio lighting with soft rim light, shot on 50mm lens f/2.8, photorealistic product photography, 8k, ultra detailed
Interior prompts need material detail because you're working at a closer scale. "Quilted leather" with "contrast stitching" specifies upholstery treatment. "Carbon fiber trim" communicates a specific weave pattern and surface finish.
Sketch the form and silhouette once, then explore finish variations through prompts without redrawing the entire vehicle. You can see the same design in metallic silver, matte black, and pearl white to evaluate which direction works best, all within minutes instead of hours.
Material-Specific Prompt Modifiers
Use manufacturing process terms in your prompts to control how light interacts with surfaces. Some examples of materials include “brushed aluminum,” “polished chrome,” and “anodized steel.” Each modifier specifies a manufacturing process that determines surface interaction with light.
This vocabulary communicates manufacturing intent through your prompts. The difference between "metal" and "powder-coated steel" signals both aesthetic direction and production methods.
For metal surfaces:
- "Brushed aluminum" - directional surface texture
- "Polished chrome" - mirror-like reflectivity
- "Anodized steel" - colored protective coating
- "Powder-coated steel" - durable matte coating
- "Satin nickel" - low-gloss metallic finish
- "Oxidized copper" - aged patina surface
These specific metal descriptors guide rendering engines to understand how light should interact with your metal surfaces, producing production-ready results instead of generic metallic finishes.
For plastic materials:
- "Glossy ABS" - high-shine injection-molded surface
- "Textured polycarbonate" - patterned, durable plastic
- "Soft-touch plastic" - rubberized coating
- "High-impact polypropylene" - structural plastic
- "Translucent acrylic" - semi-transparent material
Plastic terminology separates consumer-grade finishes from technical materials, ensuring renders match your manufacturing intent.
For wood specifications:
- "Solid walnut construction" - natural wood species with grain visible
- "Natural oak grain" - wood texture specification
- "Ebonized ash" - black-stained wood
- "Natural teak with oil finish" - protective coating specification
- "Live edge maple" - natural bark edge detail
- "Oiled birch" - finished natural wood surface
Wood grain visibility and finish details determine whether renders show authentic material character or generic wood tones.
For composite materials:
- "Carbon fiber weave visible" - technical composite pattern
- "Brushed brass" - metallic accent finish
- "Tempered glass" - transparent structural material
These specific material descriptors guide rendering accuracy in ways that generic terms cannot. Combined with proper lighting specifications, they ensure photorealistic material representation that reads as production-ready rather than conceptual.
Lighting Setups That Control Mood and Detail
Choose studio lighting for material detail, golden hour for lifestyle context, hard lighting for form evaluation, or soft diffused light for surface finish emphasis. Lighting determines whether brushed aluminum reads as production-ready metal or a generic silver surface.
The same material specification renders differently under studio lighting versus golden hour. Lighting changes whether your render communicates manufacturing precision, lifestyle aspiration, or technical capability.
- Studio lighting creates controlled, multi-point setups that enhance material detail and surface texture. Hard studio lighting creates deep shadows that emphasize form and surface details, making it ideal for showcasing product character lines and sculpting.
- Golden hour lighting provides warm, directional illumination suitable for product photography and lifestyle contexts, creating authentic atmospheric conditions approximately one hour after sunrise or before sunset.
- Hard lighting emphasizes form and surface detail. Use this approach for evaluating how your surface sculpting and character lines work together.
- Soft diffused light minimizes harsh shadows and provides even, gentle illumination. Use this approach for products where surface finish and material quality are the priority over dramatic form definition.
- Cinematic lighting creates high-contrast, atmospheric presentations for concept exploration where you're trying to capture a specific mood or market position.
Common Mistakes That Waste Your Time
Specify three to five core elements: product form, material specifications, lighting setup, viewing angle, and background style. Vague descriptions like "smartphone design" tell the system almost nothing. This focused approach gives the system enough information to generate useful output without overwhelming it with competing priorities.
Describing everything in one massive paragraph makes the system struggle to prioritize what matters. If you need more detail, iterate rather than cramming everything into the first generation.
Negative prompts eliminate unwanted elements and artifacts. Include negative specifications to eliminate common artifacts:
negative: text, watermark, lowres, noisy, oversaturated, dust, fingerprints, distortion, manufacturing defects
This cleanup work happens automatically instead of requiring post-processing fixes later.
Platform-specific syntax varies significantly. Some tools use parameter flags for aspect ratio and stylization strength. Others require conversational language and iterative refinement. Check your platform's official documentation and adapt your prompt structure accordingly.
Track your metadata immediately after getting good results. Sketch-to-render tools often lack automatic reproduction of successful renders without logging. Screenshot prompts, copy them to a spreadsheet, or save them in a note-taking app.
Making Prompts Work for Your Process
Prompts work as technical specifications that describe exactly how you want your design to appear: complete material compositions, lighting setups, camera angles, and finish details. The better you understand materials, lighting, and photography fundamentals, the better your prompts become.
Start with structured templates that you can modify rather than writing every prompt from scratch. Build a library of proven formulas for different product categories and presentation styles by documenting successful prompts and reusing structured approaches. Template-based approaches cut iteration time significantly, enabling faster exploration of design options across product lines.
Iterate systematically instead of randomly. Change one element at a time (adjust materials, modify lighting, or shift the camera angle individually) so you can identify what actually improved your result. If you modify materials, lighting, and camera angle simultaneously, you won't know which change made the difference.
Spend less time fighting with tools and more time making design decisions. Good prompts get you to useful renderings quickly so you can evaluate directions, spot problems, and push concepts further.
Generating multiple material variations significantly faster than traditional rendering methods changes the direction you pursue. You see more possibilities. You catch problems earlier. You have better conversations with clients because you can show alternatives instead of defending a single option.
Vizcom's built-in drawing tools let you define your product's form and proportions quickly, iterating on shape without redrawing every detail.
Render shows that exact form in brushed aluminum, matte plastic, or carbon fiber within seconds, so you can evaluate which material direction works best before committing to detailed CAD work. If you need to evaluate proportions from multiple angles, Make 3D converts those renders into textured meshes that you can rotate 360 degrees to spot proportion problems early.
That speed lets you see your chair design in walnut, oak, and ebonized ash within minutes instead of hours, making better design decisions because you can actually explore the variations these prompts make possible.
Explore
Explore more blog posts & resources to get inspired

How Jaren Dorman validated a Puma concept before committing to any of it.
Designer Tara Harcombe took her idea all the way from the first pencil lines to the finished piece, with Vizcom in the loop the whole way.
Frequently asked questions
Yes of course! Our starter plan is completely free, no credit card required. This is a great plan to explore vizcom with.
We accept all major credit and debit cards.
Admins (paid) – can edit files, manage workspace settings, billing, teams, and invite members. Editors (paid) – can edit files but not manage settings, billing, or teams. Viewers (free) – can only view files in read-only mode.
Team billing is handled centrally by the Admin. All paid seats, whether Admins or Editors, are included in a single invoice under the same billing cycle, while Viewers remain free and do not affect the cost.
Yes, you can. An Admin can update the plan in the billing settings, and the switch will take effect on the next billing cycle at the annual rate.
Yes, you own everything you create in Vizcom. For free users, while Vizcom may use generated images to improve its services, it does not claim ownership of your designs, concepts, or original ideas—you keep full rights to them. For paid users, your images and designs remain entirely private and are only used to deliver the service. Every design, concept, and image you create or upload is fully yours and kept confidential.
Vizcom does not use your data to train AI models if you’re on a paid plan. Everything you create stays private and is only used to provide the service. Free users may have their generated images included to help improve Vizcom’s services, but even then, Vizcom does not claim ownership of your designs, concepts, or original ideas—you retain full rights.